Showing posts with label headband. Show all posts

Monday, August 18, 2014

DIY Ombre Headband


Welcome to the 3rd installment in the One T-Shirt, Three DIYs miniseries!

The first two projects in the miniseries were a hand-stamped headband and a beach-ready crop top, and all three of these projects can be made using a single old t-shirt.

Today's project is the quickest one in the series, with only a minute or two of hands-on crafting.  (But it does involve a couple hours of hands-off drying time; so don't forget to factor that into your schedule.)

Friday, July 18, 2014

Handmade Vacation Wardrobe

I get a huge kick out of wearing things I've made myself, don't you?

With that in mind, here are some pictures of my handmade items in action on our Hawaiian vacation.

Tuesday, June 24, 2014

DIY Stamped T-Shirt Headband


I'm not going to lie, I'm pretty excited about my latest craft project, and this headband is only one third of it!

Instead of using one t-shirt to make one DIY project, I realized that I could use one t-shirt to make three DIY projects.  So this is the first installment in the One T-Shirt, Three DIYs miniseries.  Let's do this!

Thursday, April 4, 2013

A Bump in the Road

I'm definitely not perfect and sometimes my knitting projects aren't perfect either.

I had this grand idea to make a lace knit headband that would wrap around my head and close at the back with 2 cute little buttons.  I like making up my own patterns, so I picked out a cool stitch from The Knitter's Bible, then I looked through my blog archives to remember how many stitches I had cast on the last time I made headbands, and I started knitting.


When I bound off, I was super happy with the way the lace mesh stitch looked, and I was flying high until I held it up to my head to see if it fit.  It did not fit.


This almost always happens the first time I try out a new project.

In this case, I clearly need to cast on more stitches when working in lace mesh than when working in stockinette stitch like I did with my last headband pattern.

When I try this again, I'm going to need to add at least 10 or 15 more stitches when I'm casting on.  Unfortunately I don't think that many stitches will fit on the flat needles I used for my first attempt, so I'll have to switch to my round needles.  It's not a big deal, but I prefer knitting with flat needles; I think they're just a little bit more comfortable to work with.

Hopefully I'll have a successfully finished headband to share with you next time!
xoxo
Laura

Wednesday, March 14, 2012

A Rhinestone Headband

Hola from Miami!

I'm here doing a show for about a month, soaking up the sun and browsing crafting blogs (I can't help myself), and that is how I stumbled across Anne Weil's blog Flax & Twine.  I particularly loved her blog about making sparkly headbands, which you can find here, so I decided to try it myself!

 Here is the super-awesome result:


These are the things I used:
  • Plastic headband
  • Embroidery thread
  • Rhinestone trim (I found mine for $3 in the craft section at Walmart)
  • Glue (E6000!)
  • Old magazines to cover my work surface (E6000 is messy)
  • Scissors

This is how I made it:

To start, I covered my table with magazines and glued the end of the thread onto the inside of one end of the headband.


Then I wrapped the thread around the headband over and over to cover it up.


At the top of the headband where there are teeth, I wrapped the thread between each tooth twice and didn't worry about the headband showing because it gets fully covered later on.


When I got to the other end of the headband, I glued the thread to the inside of the headband and cut off the excess.


Then it was rhinestone time!  I laid them over the headband, checking to make sure they were centered, and then I glued on the end of another piece of thread and began wrapping it just like before.  For continuity, I wrapped the thread 4 times in between each rhinestone.


I continued wrapping the thread until I got to the end of the string of rhinestones and then I glued the thread in place and cut it off.


And that was that!  The whole project only took about an hour, and I would highly recommend trying it yourself as well as checking out all the other cool tutorials on Flax & Twine.


Now I'm headed back out to the pool!
xoxo
Laura

Sunday, January 22, 2012

Headband Curls

Have you heard of Pinterest?  I'm assuming the answer is yes because I'm pretty sure I'm one of the last people on this bandwagon, but if you haven't checked it out, it's a really cool website where you can create pinboards of things you've found on the internet.  I've started using it to find and keep track of all sorts of things I'd like to try making (and subsequently blogging about right here).  One of the things I'm really loving on Pinterest is all the pictures of cool hairstyles.  I have long hair, and I love creating fun hairstyles, so I'm going to start trying out the styles I find and blogging about the good ones.

Today I'm going to write about some fun curls that I found a picture of on Pinterest that originally came from this youtube video.  These curls are great because they require no heat so they won't damage your hair.  The only downside to them is that the results are a little unpredictable as it is difficult to make all the curls exactly the same.

Start by brushing and parting your air-dried hair.


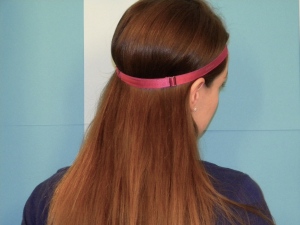
Place a stretchy headband over your hair.
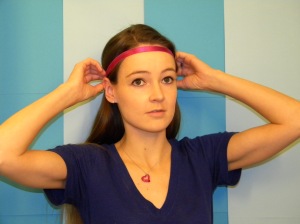
Starting on one side of your part, pull a small section of hair up and around the headband.
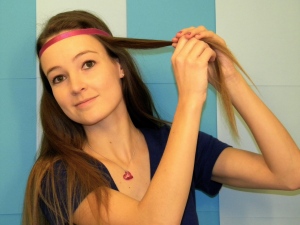
Continue wrapping strands around the headband until you've finished half of your hair.

Do the exact same thing to the other side of your hair, leaving a gap on the back of the headband so there will be room for the last step.

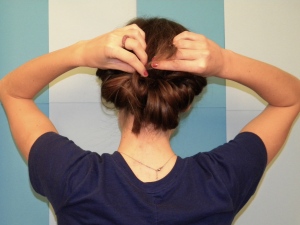
Finally, when you get to the last strand, wrap it around the headband multiple times and then tuck in the last little bit.  (This is what you were leaving room for in the last step.)
And now it's time to leave your hair alone and go to sleep (or wear it around all day because it really is kind of cute).


When you wake up in the morning, take the headband out of your hair and you'll be all wild and curly (and in my case, sleepy)  like this:

This was a really fun project for me, so I hope you liked reading about it!

Also, if you are a member of Pinterest and want to check out my pins, you can find them here.

Happy curling!
xoxo
Laura

Thursday, January 19, 2012

Knitted Headbands

Hiya from Brighton, England!

I made matching-but-not-matching Christmas presents for my three best friends on tour this year, and all three girls happen to be British so it's very fitting that I'm posting about this from a posh seaside flat in Brighton.

Headbands are in this year, at least in my circle, so that's what I decided to make for my friends.  I used the same sparkly white yarn for all three, but I put different accents on each one so they all have their own personalities.

These are the supplies I used:
  • US size 7 circular needles for the headbands
  • US size 7 flat needles for the accents
  • Sparkly white yarn
  • Tapestry needle
  • Scissors (My scissors are pictured inside my super-fun knit kit, which I highly recommend.)
Here is how you make the basic headband:  
  • Cast on 76 stitches with the circular needles
  • (Knit 1, Purl 1) rib for 4 rows
  • Knit 10 rows 
  • (Knit 1, Purl 1) rib for 4 rows
  • Cast off


And now it's time to personalize them!

For my friend Lauren, I made a sleek band like this:


Band Instructions:
  • Cast on 10 stitches

  • (Knit 1, Purl 1) rib for about 3 inches

  • Cast off

  • Wrap the band around the headband and sew it together

For my friend Vicki, I knitted a bow:


Bow Instructions:
  • See this post from Lion Brand, and follow the directions for the large bow.

For my friend Cheryl, I made a flower like this:


Flower Instructions:

And here are all three of them, wearing their new presents on Christmas day!


Cheers!
xoxo
Laura


Related Posts Plugin for WordPress, Blogger...