Showing posts with label hair. Show all posts

Monday, May 12, 2014

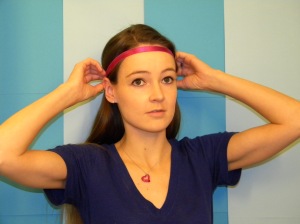
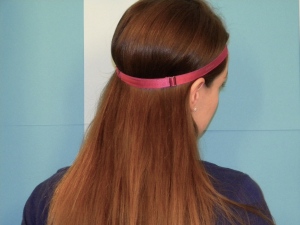
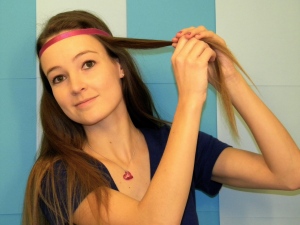
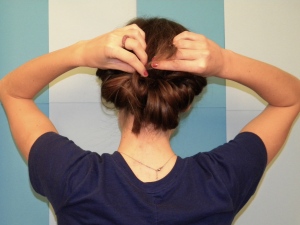
Bridesmaid Hairstyle #4: An Oh Joy Updo


I was browsing Oh Joy the other day and I ran across her tutorial for a pretty floral updo.  I thought it might be nice for the wedding, so I tried it out yesterday!  I'm obviously skipping the floral part, though, because I need to fit in with the other bridesmaids.

This hairstyle is like a cross between The Twisted Sister from the Beauty Department and The Crisscross Ponytail from A Beautiful Mess.  There's a topsy tail ponytail on the top followed by criss crosses in the middle and a bun at the bottom.

It's a cute idea, but I like it way better on Joy's hair with all those flowers she put in it.

Only 2 weeks until the wedding!
xoxo
Laura

Sunday, May 4, 2014

Bridesmaid Hairstyle #3: The Double Rope Braid Bun


I tried out another potential bridesmaid hairstyle today, and it very well may be the winner!

It's the double rope braid bun from The Beauty Department.  I love it because it was easy to do (it only took 2 attempts for me to figure it out) and it's super sturdy; I've had it in for at least 5 hours and it's still holding strong without any hairspray.

There will obviously be hairspray involved on the big day, but I just wasn't in the mood for it on a day off from shows.  I try to give my hair a break when I can, you know?

Anyway, this wasn't actually the hairstyle I had meant to try out today.  I was planning on making a bow out of my hair, but it was a lot harder than I had anticipated, and I couldn't get it to work.  I'm going to keep working on that one though, because I think it looks awesome.  I'll definitely be blogging about it if I ever succeed.

Have you done the double rope braid or the hair bow in your hair before?

xoxo
Laura

Monday, October 7, 2013

Showgirl Beauty Tip: Powdering your Hair


Dry shampoo.  It’s a beautiful thing.  But what if you’re in a pinch and you don’t have any? 

Miscalculations in a hair-washing schedule can happen to anyone.  There are a couple of very reasonable alternatives to dry shampoo lying around in any dressing room, and they’re probably in your bathroom at home as well.

To remove grease from your hair, pour some baby powder into the palm of your hand, rub your hands together, and then run your fingers through your hair.  

The baby powder will soak up the grease.  If you can see white residue in your hair afterward, simply brush your hair and it will disappear.

Don’t have any baby powder?  Foot powder works just as well.  This summer I watched one of my friends rub foot powder into another girl’s hair before the shows and it worked like magic.  Her hair looked clean again.

This tip is obviously not an alternative to washing your hair and practicing good hygiene, but it sure works beautifully for the occasional “I mistakenly thought I could make that blowout last one more day” moment.

Happy powdering!
xoxo
Laura

Friday, September 27, 2013

The Rope Twist Tutorial


Last month, when I posted my i-cord bracelet knitting pattern, I received a couple of requests for a tutorial on the way I was wearing my hair in those pictures, so here it is!

I styled my hair in a rope twist that day because I was heading to a party where I knew there would be plenty of pictures taken so I wanted to look nice, but I was also in a hurry so I wanted a hairstyle that I could do quickly.  Those two criteria pretty much sum up the rope twist!  It's vaguely like french braiding, but it's quicker and easier because you're only working with two strands of hair instead of three.

Here's how you do it:


1.  Start with two small strands of hair.  Hold one in each hand.

2.  Cross your arms.  When you do this, you always want the strand of hair that's closest to your face to cross over the strand that's closer to the back of your head. That will make your "rope" twist in the correct direction.  Because I'm working with the left side of my hair, I'll always be crossing my right arm over my left arm.

3.  Keeping your hair crossed, switch your hands so they're holding onto the opposite strands and your arms are no longer crossed.  Then add a bit more hair to each strand that you have in your hands.  In the third picture, you can see that I'm holding the existing strands in my fists while using my thumb and index finger to pick up the new hair.

4.  Cross your arms again.


5 and 6.  Continue repeating steps 3 and 4 until your rope is as long as you want it to be.  Just keep switching your hands so they're no longer crossed, adding new hair to the existing strands in your hands, and then crossing your arms, over and over again.

7.  Secure the end of your rope with bobby pins.  (Make sure they're crossed!)

8.  Shake your head around a little to test that your rope is secure.  You're all finished.

I hope you find this tutorial useful!

I probably wear my hair like this at least once a week in every day life, and almost every day when I'm performing in shows.  It's a great way to keep your hair out of your face.

Happy twisting!
xoxo
Laura

P.S.  Notice the haircut?  My friend, Shawna, cut off about a foot of my hair for me and I donated it to Locks of Love.  My hair is my favorite feature and it grows really quickly, so I decided to share the love with a kid in need.


Monday, July 8, 2013

Showgirl Beauty Tip: Hairspray


I've been a professional ice show skater for the past 7 years and, believe me, I've picked up a beauty trick or two along the way.  Why not share some of them?

So here's today's tip:

If your hairspray isn't keeping its hold and your flyaways are starting to act up, spritz a little water on your hair.  The water will re-activate the hairspray and everything will be under control again in no time.

Happy hairstyling!
xoxo
Laura

Thursday, November 1, 2012

A French Braid into a Ponytail

Lately I've been loving wearing my hair in a french braid that leads to a ponytail like this:

It all started because I was reminiscing about my old skating competition hairdos.  I used to put my hair in two super-tight braids that met at the back of my head to form a bun, and then adorn it with some fake flowers or rhinestones and a massive scrunchie.  It was clearly awesome, as evidenced by the picture below:


So anyway, when I found myself thinking about that old hairstyle, I realized that it's actually quite possible to take the main idea of it and update it to be fun and modern.  I achieved the update by making one braid that is as thick and chunky as possible so it naturally wants to loosen up, giving it an easy breezy look.

Here's how to do it:
(Note: This tutorial assumes that you already know how to braid your hair.  Leave me a comment if that isn't the case and you would like me to do a tutorial on basic braiding skills.)

1.  Brush your hair to begin.

2.  Separate out the first section of hair starting at your temples, halfway between the top of your hairline and the top of your ears and begin to french braid.  (A french braid is the same as as regular braid, except you add a new section of hair to the braid every time you cross a piece of hair into the middle.)

To make your hair symmetrical and to keep the braid large, take sections of hair from the following points on each side of your head as you are french braiding:
     3.  The top of your ear.
     4.  Halfway between the top of your ear and the middle of your neck.
     5.  The middle of your neck (aka the last of the hair).

6.  Now grab the base of the braid in one hand, as close to where the braid ends as possible.

7.  Use a hair rubber band to make a ponytail where you were holding the end of the braid.

8.  You've now got a french braid into a ponytail.


If you want, you can turn that ponytail into a messy bun:

1.  Twist the ponytail around your fingers, then wrap it around itself.

2.  Add a second hair rubber band to secure the bun.

You don't want the bun to be too tight or perfect for the same reason that you want the braid to loosen up on its own; it makes it look more casual.


Happy braiding!
xoxo
Laura

Sunday, January 22, 2012

Headband Curls

Have you heard of Pinterest?  I'm assuming the answer is yes because I'm pretty sure I'm one of the last people on this bandwagon, but if you haven't checked it out, it's a really cool website where you can create pinboards of things you've found on the internet.  I've started using it to find and keep track of all sorts of things I'd like to try making (and subsequently blogging about right here).  One of the things I'm really loving on Pinterest is all the pictures of cool hairstyles.  I have long hair, and I love creating fun hairstyles, so I'm going to start trying out the styles I find and blogging about the good ones.

Today I'm going to write about some fun curls that I found a picture of on Pinterest that originally came from this youtube video.  These curls are great because they require no heat so they won't damage your hair.  The only downside to them is that the results are a little unpredictable as it is difficult to make all the curls exactly the same.

Start by brushing and parting your air-dried hair.


Place a stretchy headband over your hair.
Starting on one side of your part, pull a small section of hair up and around the headband.
Continue wrapping strands around the headband until you've finished half of your hair.

Do the exact same thing to the other side of your hair, leaving a gap on the back of the headband so there will be room for the last step.

Finally, when you get to the last strand, wrap it around the headband multiple times and then tuck in the last little bit.  (This is what you were leaving room for in the last step.)
And now it's time to leave your hair alone and go to sleep (or wear it around all day because it really is kind of cute).


When you wake up in the morning, take the headband out of your hair and you'll be all wild and curly (and in my case, sleepy)  like this:

This was a really fun project for me, so I hope you liked reading about it!

Also, if you are a member of Pinterest and want to check out my pins, you can find them here.

Happy curling!
xoxo
Laura
Related Posts Plugin for WordPress, Blogger...