I'm having a great weekend, how about you?
Yesterday was ridiculously busy and fun (according to my fitbit, I took 17,671 steps!), and today is turning out to be a super-relaxing day of crafts. It's the perfect balance.
4 things that are making me happy this weekend:
1. This flower crown that I bought at the Renaissance Festival yesterday. And the insanely adorable memory of my 2 1/2 year old niece wearing hers too.
Showing posts with label hairstyles. Show all posts
Sunday, June 22, 2014
Sunday, June 8, 2014
DIY Fresh Flower Crown
Remember the baby's breath hair pins I made for all the guests to wear during my best friend's bachelorette party a couple weekends ago? Well today's post is about the baby's breath crown that I made for the bride to wear at that same party. I figure there's no better excuse than your own bachelorette party to get to wear a pretty crown!
Labels:
bachelorette party,
Crafts,
flowers,
hair accessories,
hairstyles,
wedding
Wednesday, May 28, 2014
An easy floral DIY with big impact
My best friend's wedding finally happened this past weekend, and it was even more awesome than I had imagined it would be. The bride looked stunning in her dress, the champagne was free-flowing, and I danced right out of my shoes.
Before we got to the wedding, however, there was the small matter of the bachelorette party that I hosted and the slightly obscene amount of DIY projects that I got myself into because of it.
First up on that list were some cute little baby's breath hair pins that I made for all the party guests to wear to the bar. They matched the baby's breath flower crown that I made for the bride, and I felt that they were a classier approach to the whole bachelorette scene than anything they sell down at the local party store.
While these flowers looked great at the bachelorette party, I could also envision them fitting right in at the wedding itself, and that's why I like them so much.
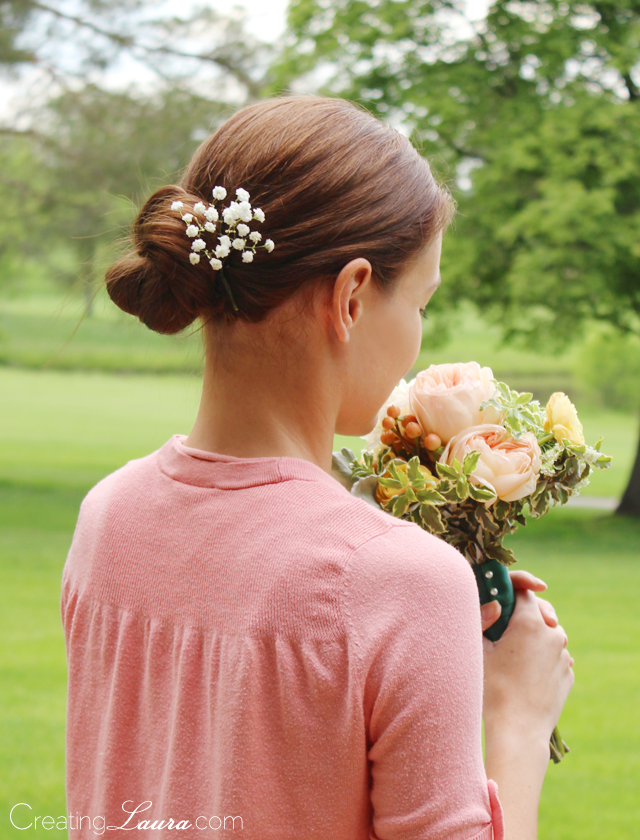
I actually made myself a new one to wear to an outdoor dinner with my extended family this evening, which is what you're looking at in the picture above. And wouldn't it be perfect to pop one of these into your hair for a summer music festival or a picnic-style date in the park? These are shaping up to be my go-to hair accessories this spring/summer.
Before we got to the wedding, however, there was the small matter of the bachelorette party that I hosted and the slightly obscene amount of DIY projects that I got myself into because of it.
First up on that list were some cute little baby's breath hair pins that I made for all the party guests to wear to the bar. They matched the baby's breath flower crown that I made for the bride, and I felt that they were a classier approach to the whole bachelorette scene than anything they sell down at the local party store.
While these flowers looked great at the bachelorette party, I could also envision them fitting right in at the wedding itself, and that's why I like them so much.
I actually made myself a new one to wear to an outdoor dinner with my extended family this evening, which is what you're looking at in the picture above. And wouldn't it be perfect to pop one of these into your hair for a summer music festival or a picnic-style date in the park? These are shaping up to be my go-to hair accessories this spring/summer.
Labels:
bachelorette party,
Crafts,
flowers,
hair accessories,
hairstyles,
wedding
Friday, April 18, 2014
Bridesmaid Hairstyle #2: A Crisscross Ponytail
I tried out another wedding hairstyle idea this afternoon.
It's a crisscross ponytail that I saw on A Beautiful Mess.
It turned out to be really easy to do. I just made a ponytail while omitting sections of hair on either side in the front, then I crossed those sections of loose hair at the back of my head and secured them with a few pins. I finished it off by wrapping the remaining hair around my hair elastic and curling the ponytail.
If you're interested in trying this on your own hair, you can click on the link above for a much more in-depth step-by-step tutorial.
I love the way this style looks from the back, but from the front it looks a little plain. Maybe it would be nice to leave a few strands loose in the front and curl them?
One thing I really like about the crisscross pony is that it feels secure enough to last all evening at the wedding. The french twist that I tried out didn't hold up so well; and I think this one will perform much better in that area.
It's certainly a contender.
xoxo
Laura
Labels:
Beauty,
bridesmaid hairstyle,
hairstyles,
ponytail,
wedding
Friday, April 4, 2014
Bridesmaid Hairstyle Idea #1: The French Twist
My best friend's wedding is less than 2 months away! I'm very excited about it.
I'm head over heels about being the maid of honor for a million reasons. One such reason is the excuse to wear a really fancy hairstyle, on which it's perfectly acceptable to spend a lot of time and energy.
I've decided to try several different hair options over the next few weeks, record them here on the blog, then pick a winner on the week of the wedding.
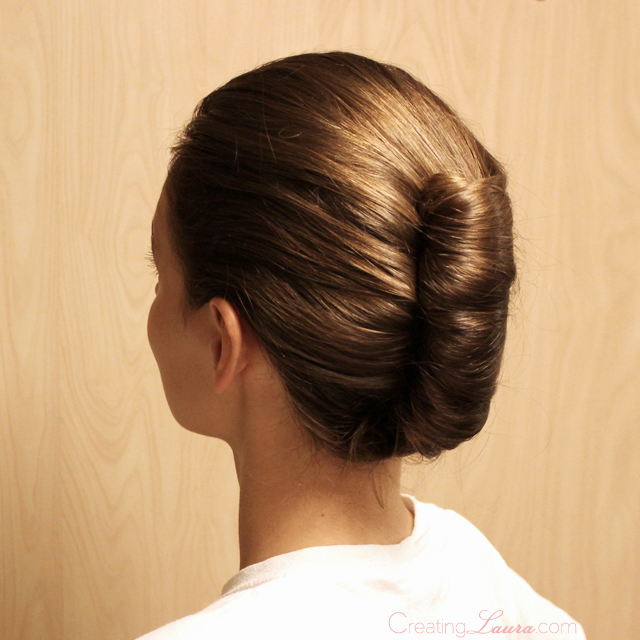
The first style I'm trying out is a french twist. It's simple, classic, and elegant, and I've actually never succeeded at doing my hair like this until today.
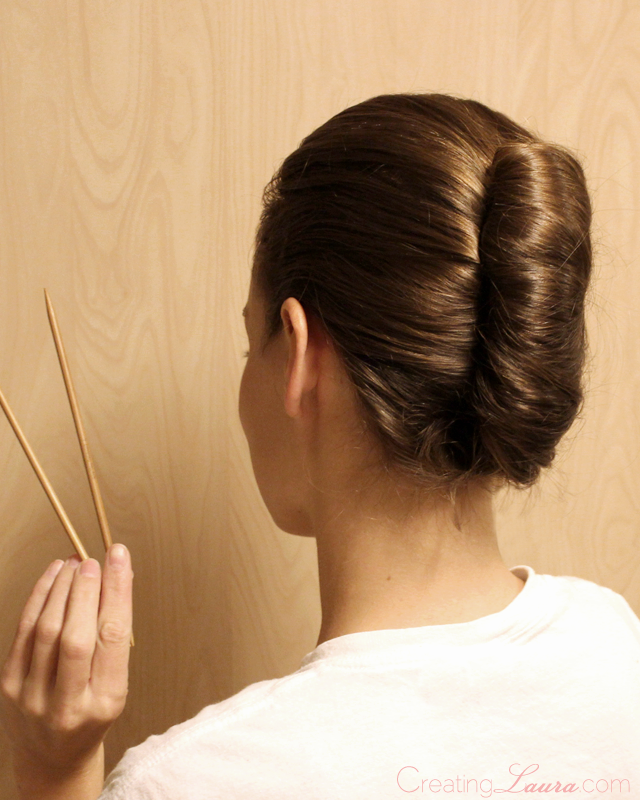
The cause of my sudden french-twisting abilities is the Fine Frenchy tutorial from The Beauty Department. I didn't have any chop sticks to twist my hair with, so I used knitting needles instead, but this whole concept was a total game changer for me.
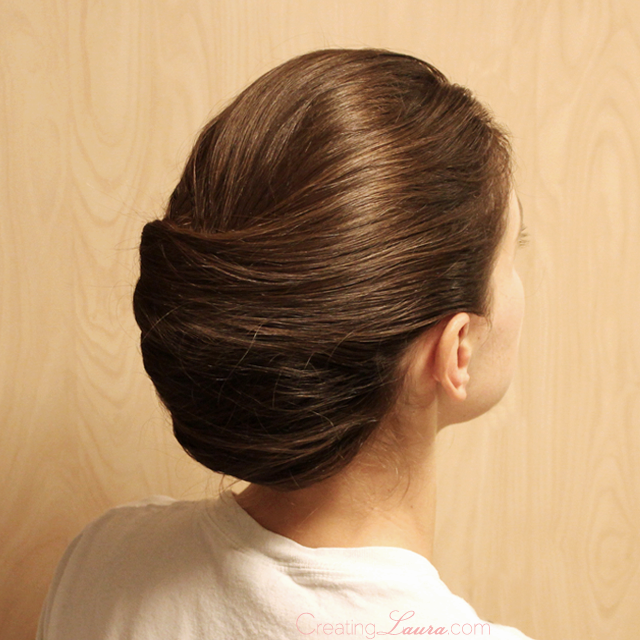
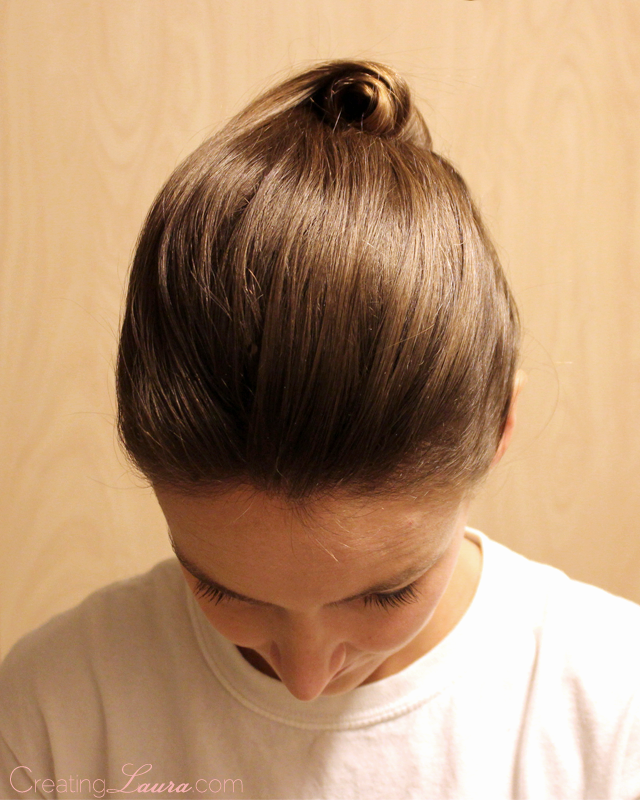
Here is my first-ever successful french twist:
I've still got my hair in the twist as I type this, and I'm going to keep it in all evening to see how it holds up. I want my hair to look chic for the entirety of the wedding, not just the first hour or two, so staying power is an absolute must.
Have you ever tried the chop stick twisting technique?
xoxo
Laura
I'm head over heels about being the maid of honor for a million reasons. One such reason is the excuse to wear a really fancy hairstyle, on which it's perfectly acceptable to spend a lot of time and energy.
I've decided to try several different hair options over the next few weeks, record them here on the blog, then pick a winner on the week of the wedding.
The first style I'm trying out is a french twist. It's simple, classic, and elegant, and I've actually never succeeded at doing my hair like this until today.
The cause of my sudden french-twisting abilities is the Fine Frenchy tutorial from The Beauty Department. I didn't have any chop sticks to twist my hair with, so I used knitting needles instead, but this whole concept was a total game changer for me.
Here is my first-ever successful french twist:
I've still got my hair in the twist as I type this, and I'm going to keep it in all evening to see how it holds up. I want my hair to look chic for the entirety of the wedding, not just the first hour or two, so staying power is an absolute must.
Have you ever tried the chop stick twisting technique?
xoxo
Laura
Labels:
Beauty,
bridesmaid hairstyle,
french twist,
hairstyles,
wedding
Friday, February 8, 2013
How to Braid Your Hair
When I bother to put my hair up in something other than a 2-second ponytail, there are usually braids involved. Sometimes there are multiple braids, or french braids, or a braided bun, but there are almost always braids.
The other day someone asked me how to do a basic braid, so I decided to do a basic hair braiding tutorial this week and a french braiding tutorial next time. I hope you like them!
The main concept to braiding is that you have 3 separate sections of hair and you alternate moving the right section into the middle and then the left section into the middle over and over again until you have a braid.
1. Brush your hair and separate it into 3 equally-sized sections.
2. Move over the section that you are holding in your right hand so that it is now in the middle. Switch it to your left hand, so you are now holding two sections of hair in your left hand and only one section in your right hand. Notice that I'm holding one section with my thumb and the other section with my pointer finger so that I keep the two sections separate from each other even though they're in the same hand.
3. Now use your left hand to move the section that is the farthest to the left into the middle, and switch it to your right hand.
You've now learned everything you need to know to braid your hair! Steps 4 through 6 are really just repeats of steps 2 and 3 so that you can see how it looks as your braid progresses.
4. Move the right section into the middle and switch it to your left hand.
5. Move the left section into the middle and switch it to your right hand.
6. Move the right section into the middle and switch it to your left hand. Continue bringing the right and then the left sections into the middle until you've braided your hair all the way to the bottom. Secure it with a hair tie.
Now you know how to braid your hair! Practice it a few times and it will get easier and easier. If you have long hair, you now have all the skills necessary to make crown braids as well.
Happy braiding!
xoxo
Laura
Labels:
Beauty,
braid,
hairstyles,
tutorial
Friday, January 4, 2013
Crown Braids
I sometimes like to wear my hair in a crown of braids like I did in this post back in September. I think it's a fun look, and I don't think I'm the only one. I find some of my other favorite bloggers rocking similar hairdos from time to time, like Elsie at A Beautiful Mess.
I used to struggle with the mechanics of these braids. I couldn't make my hair lie flat when I pulled the braids up and over my head, and I always ended up with awkward poofing around the base of the braids (and everywhere, really). I used to give up and start over and over and over again before I could get it looking right. That is, until this week when I had a bobby pin epiphany that's the key to getting this hairdo perfect on the first try every time.
Here's the deal:
1. Brush and part your hair.
2. While holding your hair tight against the first side of your head, insert a bobby pin behind your earlobe to hold your hair in place.
3. Add another bobby pin so that your hair is secured with an X. I've highlighted the X in white in the picture above so that you can see how it should look.
4. Make another bobby pin X on the second side of your head as well.
5. Braid the first side of your hair, holding it straight out instead of down, and secure the end of the braid with a small clear elastic band.
6. Pull the braid up and over the top of your head so it looks like a headband and secure it to your head with a bobby pin.
7. Braid the second side of your hair in the same manner as the first.
8. Pull the second braid up and over your head also, making sure to cover up the elastic band and the bobby pin on the first braid. Secure the second braid with a bobby pin (or three) as well.
9. That's it!
I hope the bobby pin X works as well for you as it does for me. Suddenly this hairstyle only takes me 5 minutes to do, and it used to take me 20. It even looks nice from the back, see?
Happy braiding!
xoxo
Laura
Labels:
Beauty,
braid,
crown,
hairstyles,
tutorial
Thursday, November 1, 2012
A French Braid into a Ponytail
Lately I've been loving wearing my hair in a french braid that leads to a ponytail like this:
So anyway, when I found myself thinking about that old hairstyle, I realized that it's actually quite possible to take the main idea of it and update it to be fun and modern. I achieved the update by making one braid that is as thick and chunky as possible so it naturally wants to loosen up, giving it an easy breezy look.
Here's how to do it:
(Note: This tutorial assumes that you already know how to braid your hair. Leave me a comment if that isn't the case and you would like me to do a tutorial on basic braiding skills.)
1. Brush your hair to begin.
2. Separate out the first section of hair starting at your temples, halfway between the top of your hairline and the top of your ears and begin to french braid. (A french braid is the same as as regular braid, except you add a new section of hair to the braid every time you cross a piece of hair into the middle.)
To make your hair symmetrical and to keep the braid large, take sections of hair from the following points on each side of your head as you are french braiding:
3. The top of your ear.
4. Halfway between the top of your ear and the middle of your neck.
5. The middle of your neck (aka the last of the hair).
6. Now grab the base of the braid in one hand, as close to where the braid ends as possible.
7. Use a hair rubber band to make a ponytail where you were holding the end of the braid.
8. You've now got a french braid into a ponytail.
If you want, you can turn that ponytail into a messy bun:
1. Twist the ponytail around your fingers, then wrap it around itself.
2. Add a second hair rubber band to secure the bun.
You don't want the bun to be too tight or perfect for the same reason that you want the braid to loosen up on its own; it makes it look more casual.


Happy braiding!
xoxo
Laura
Labels:
Beauty,
braid,
bun,
french braid,
hair,
hairstyles,
ponytail
Monday, May 14, 2012
Sock Buns!
Hola!
Have I mentioned that I'm in Mexico? Acutally, I'm not just anywhere in Mexico; I'm in Villahermosa which is way down south near Guatemala and the equator, so it is super duper hot here. And naturally our ice show is outside in the 100 degree heat. Just doing our hair backstage makes us break a sweat, let alone actually skating in the show, so all the girls have started wearing our hair in braids and buns to keep it off of our sticky skin. Last week, one of my friends borrowed another girl's hair donut to make a bun, but she didn't know how to use it, so I showed her. That got me thinking about all the fun ways to wear your hair in a bun, so I decided to do a bun blog! I don't have a donut here with me, but that's no problem at all because you can make an equally great bun with a sock. Just cut a hole in the toe area, roll it up on itself until it is the shape of a donut and you're ready to roll. It's preferable to use a sock that's similar to your hair color, but I used a colorful one for these tutorials so you can see it better.
Here's what a basic sock bun looks like:
And here's how you do it:
1. Put your hair in a ponytail.
2. Put your rolled-up sock over your ponytail holder.
3. Pull the sock down to the bottom of your hair.
4. Begin to roll your hair around the sock by turning the sock-donut inside out over and over again while it rolls up your hair.
5. Roll...
6. it...
7. up!
8. Once all your hair is rolled over the sock and it's on the top of your head, make any necessary last minute adjustments, tuck in any rogue hairs that may be sticking out, and put a rubber band around the whole thing to hold it in place.
Now that you know how to do a basic sock bun, there are a million different ways to wear it and make it your own. I've done a few variations here on this blog, but the beauty of these buns is that you can make up all sorts of different ways to wear them yourself. Anything that involves a ponytail can also involve a sock bun, so get creative!
Here's a basic sock bun with a braid wrapped around it:
And here's how you do it:
1. Put your hair in a ponytail, pull a small-ish section of hair from the ponytail off to the side and clip it out of the way for safe keeping.
2. Roll the rest of your ponytail (that you didn't clip to the side) up into a sock bun.
3. Secure the sock bun with a rubber band.
4. Un-clip the section of hair that you saved for later and braid it.
5. Loosely wrap the braid around the base of the sock bun.
6. Secure the braid with a bobby pin and you're all finished!
Here is a low bun with the sides all twisted up so your hair stays out of your face:
And here are the directions:
1. Make a part and twist your hair away from your face on one side, starting up near your part and moving down.
2. Secure the hair you just twisted with a clip so that you can come back to it later.
3. Now twist the other side of your hair so it matches the first side.
4. Take out the clip you used earlier and put all of your hair in a low ponytail, being careful not to un-twist all the hair you just twisted.
5. Turn the ponytail into a sock bun.
6. Secure the bun with a ponytail holder.
And now it's time for my personal favorite...
The upside down braid into a high bun:
Here's how you do it:
1. First of all, take a deep breath and believe in your braiding ability, because french braiding upside down is not as hard as it looks. Then flip your head upside down and give it a go, starting the braid as close to the nape of your neck as possible.
2. Continue your french braid until you are about even with the top of your ears.
3. Stop french braiding but continue a regular braid up about 2 more inches so you'll have some extra braid to work with if you need it.
4. Pull the rest of your hair into a ponytail with the braid.
5. Stand back upright and secure the ponytail with a ponytail holder.
6. Make your sock bun, secure it with another ponytail holder and you've done it! Yay!
I really hope this blog helps spread the sock bun fun!
xoxo
Laura
Have I mentioned that I'm in Mexico? Acutally, I'm not just anywhere in Mexico; I'm in Villahermosa which is way down south near Guatemala and the equator, so it is super duper hot here. And naturally our ice show is outside in the 100 degree heat. Just doing our hair backstage makes us break a sweat, let alone actually skating in the show, so all the girls have started wearing our hair in braids and buns to keep it off of our sticky skin. Last week, one of my friends borrowed another girl's hair donut to make a bun, but she didn't know how to use it, so I showed her. That got me thinking about all the fun ways to wear your hair in a bun, so I decided to do a bun blog! I don't have a donut here with me, but that's no problem at all because you can make an equally great bun with a sock. Just cut a hole in the toe area, roll it up on itself until it is the shape of a donut and you're ready to roll. It's preferable to use a sock that's similar to your hair color, but I used a colorful one for these tutorials so you can see it better.
Here's what a basic sock bun looks like:
And here's how you do it:
1. Put your hair in a ponytail.
2. Put your rolled-up sock over your ponytail holder.
3. Pull the sock down to the bottom of your hair.
4. Begin to roll your hair around the sock by turning the sock-donut inside out over and over again while it rolls up your hair.
5. Roll...
6. it...
7. up!
8. Once all your hair is rolled over the sock and it's on the top of your head, make any necessary last minute adjustments, tuck in any rogue hairs that may be sticking out, and put a rubber band around the whole thing to hold it in place.
Now that you know how to do a basic sock bun, there are a million different ways to wear it and make it your own. I've done a few variations here on this blog, but the beauty of these buns is that you can make up all sorts of different ways to wear them yourself. Anything that involves a ponytail can also involve a sock bun, so get creative!
Here's a basic sock bun with a braid wrapped around it:
And here's how you do it:
1. Put your hair in a ponytail, pull a small-ish section of hair from the ponytail off to the side and clip it out of the way for safe keeping.
2. Roll the rest of your ponytail (that you didn't clip to the side) up into a sock bun.
3. Secure the sock bun with a rubber band.
4. Un-clip the section of hair that you saved for later and braid it.
5. Loosely wrap the braid around the base of the sock bun.
6. Secure the braid with a bobby pin and you're all finished!
Here is a low bun with the sides all twisted up so your hair stays out of your face:
And here are the directions:
1. Make a part and twist your hair away from your face on one side, starting up near your part and moving down.
2. Secure the hair you just twisted with a clip so that you can come back to it later.
3. Now twist the other side of your hair so it matches the first side.
4. Take out the clip you used earlier and put all of your hair in a low ponytail, being careful not to un-twist all the hair you just twisted.
5. Turn the ponytail into a sock bun.
6. Secure the bun with a ponytail holder.
And now it's time for my personal favorite...
The upside down braid into a high bun:
Here's how you do it:
1. First of all, take a deep breath and believe in your braiding ability, because french braiding upside down is not as hard as it looks. Then flip your head upside down and give it a go, starting the braid as close to the nape of your neck as possible.
2. Continue your french braid until you are about even with the top of your ears.
3. Stop french braiding but continue a regular braid up about 2 more inches so you'll have some extra braid to work with if you need it.
4. Pull the rest of your hair into a ponytail with the braid.
5. Stand back upright and secure the ponytail with a ponytail holder.
6. Make your sock bun, secure it with another ponytail holder and you've done it! Yay!
I really hope this blog helps spread the sock bun fun!
xoxo
Laura
Labels:
Beauty,
hair donut,
hairstyles,
high bun,
sock bun,
upside down braid
Subscribe to:
Posts (Atom)