Showing posts with label Halloween. Show all posts

Saturday, October 26, 2013

Link to Love: Baby Halloween Costumes

Have you ever typed random search terms into Ravelry's pattern library just for fun?  If you haven't done it before; I highly recommend it.

The search that really got me smiling today was Baby Halloween Costumes.

It renders 3 whole pages of adorableness like The Very Hungry Caterpillar Halloween Costume by Shayna Denham.

Image via Shayna Denham on Ravelry
The knit and crochet baby costumes pretty much max out the cuteness scale.

If you've already checked that out and you're in the mood for more, the Pet Halloween Costume search will also make your heart smile.

Have fun browsing!
xoxo
Laura

Thursday, October 17, 2013

Sewing a Halloween Pennant Bunting


Want to know a secret?  When I found out I only had one day to pack and leave for this new ice show, I spent a little bit of time packing and a whole lot of time finishing up and photographing all the craft projects that I had been working on at home.  I guess it’s pretty obvious where my priorities lie.

This string of Halloween flags is the last of those projects from home, and looking through the pictures this afternoon, I really wished I were still there.


That’s my mom in the picture with me.  (Hi, Mom!)

I’ve been gone for two weeks, and I bet those leaves are all yellow now.

I used my mom’s sewing machine to make these flags, and I didn’t use a pattern; I just made one up as I went along.

For six double-sided flags, I used two quarters of fabric from Fancy Tiger Crafts.  I strung them together using double fold bias tape.


To begin, I drew a triangle on my fabric that was 8 inches wide and 10 inches long.  Then I cut it out and used it as a stencil to trace and cut out five more triangles on that fabric and six triangles on the other fabric.


Next, I made six triangle sandwiches, using a triangle from both fabric colors for each sandwich, with the front sides of the fabric facing in.  I pinned two of the sides together and left the 8-inch top unpinned.  

Then I sewed along all the pinned sides.  I left the unpinned side un-sewn on each triangle so that I could reach inside each triangle and turn it right-side-out.  

Once they were right-side-out, I ironed each of the triangles so they had nice crisp edges and then top stitched around all of their edges (including the edge that hadn’t been sewn shut before).


Now that I had six finished triangles, I drew myself a little diagram to decide exactly where to place the flags on the bias tape.  I settled on 2 inches between each flag.

I snuggled the 8-inch edge of each triangle inside the fold of the bias tape and pinned it together.

After the triangles were all pinned to the bias tape, I sewed along the bottom edge of the tape, took out the pins, and I was finished.

I’m super happy with the finished product!


The only detail that I didn’t love was the way the bias tape was folded.  When I took it out of the package, it wasn’t folded perfectly down the middle.  I left it the way it was, but if I were to make this project again, I think I would try to fix it with an iron.

Do you know if all bias tape is folded ever so slightly off center, or do you think I just got a funny one?  If you were making this project, would you bother to re-iron the fold to make it perfect?

Either way, I’m proud of this little project, and I’ve currently got it hanging in my cabin on the ship, spreading some fall cheer.

Happy sewing!
xoxo
Laura

Thursday, October 10, 2013

DIY Doily Pumpkins


I love Halloween crafts!  I feel like the possibilities are endless.

Last year, I created mason jar jack-o”-lanterns, and I tied myself a poofy tutu the year before that.  

This year I was so excited for Halloween crafting that I ended up making three things!  There was the Halloween party backdrop last week, today I’ll be sharing a pumpkin that I decoupaged and drilled, and I have one more project up my sleeve for next week as well.

To decorate a pumpkin like this, you’ll need the following items:


1.  A pumpkin with all the insides removed (Mine came from the “medium” bin at the grocery store.)
2.  A package of 20 paper doilies that are 10 inches wide
3.  Mod Podge glue
4.  An old toothbrush (or other brush-like tool that you’re fine with throwing away)
5.  Scissors
6.  An electric drill

Here’s how to make it:


1.  Cut the doilies in half.

2.  Cut out the solid center of the doilies so you’re left with just the pretty outside parts.

3.  Using the tooth brush, paint some mod podge onto a portion of the pumpkin.  Place a doily piece on top of the mod podge, then brush more mod podge on top of the doily.  Repeat this step over and over until the entire pumpkin is covered in doilies.


Wait a few hours for the mod podge to dry.

Once it’s completely dry, it’s time to start drilling!  Use an electric drill, to make little holes all over the pumpkin, preferably in spots that make sense with the doily pattern.


Pop a candle or two inside the pumpkin, set it on your front porch, and you’re all finished!


Happy decorating!
xoxo
Laura

Friday, October 4, 2013

DIY Photo Backdrop for an Awesome Halloween Party

Snowboarders!

I bought 4 quarters of Halloween fabric for a sewing project (that I'll be sharing soon!) and I only ended up using 2 of them.  The fabric was way too fun to let it go to waste, so I decided to make a photo booth backdrop with it.

I think it would be the perfect place for all my friends to take pictures of themselves in their Halloween costumes.  Don't you?  I'm going to be off at my next skating contract when Halloween finally rolls around, though, so I'm giving the backdrop to my friend Lei to use at her upcoming Pumpkins & Pino party.

To make this backdrop, you'll need the following things:


1.  2 quarters of Halloween-appropriate fabric  (I got mine at Fancy Tiger Crafts)
2.  Some leftover yarn
3.  Scissors
4.  Tape  (I used washi tape because I'm addicted)

Here's how to make it:


1.  Cut both quarters of fabric into strips that are 1 inch wide.  While you're doing this, don't worry about cutting your lines perfectly straight, as no one will notice if the strips are flawless or not once they're tied onto the yarn.

2.  Stack the 1 inch wide strips on top of each other and cut them again so they're 5.5 inches long.

3.  You should now have tons of little strips of fabric that are 1 inch x 5.5 inches.


4.  Lay out all the strips on the floor so that you can get an idea of the shape of the backdrop and how many fabric strips you'll want in each column.  I settled on 9 columns with 15 fabric strips in each column.  Now lay a super long piece of yarn next to your strips and start tying the strips onto the yarn, 3 or 4 inches apart.  I tied mine with a simple half knot.  Once you finish tying one column of fabric strips, continue onto the next piece of yarn, then the next and the next until you've completed all of them.

5.  It's finally time to hang it all up with some tape!  I tied a little knot at the end of the yarn and placed the tape just under the knot to prevent the yarn from slipping away from the tape.  I also used washi tape because it's pretty and I love it, but any kind of tape would be fine.

Now it's picture-taking time!
Karleen, Justin, and I had some fun with this part...

Ladies who Lunch
One more lady?
Fairies
My personal favorite: the grumpy traveler

Happy October!
xoxo
Laura

Thursday, October 18, 2012

The Pumpkins of Etsy

I was browsing the Halloween section of Etsy last night and I was blown away by the diversity of handmade pumpkins (or handmade anything, for that matter) that a person can buy these days, thanks to the good ol' internet.  With Halloween only 2 weeks away, here are my 5 favorite pumpkins available for purchase, with all photos courtesy of the sellers on Etsy:

1.  Knit cotton napkin rings from Home and Garden Zen:


2.  Paper maché pumpkins from Chesapeake Pointe:


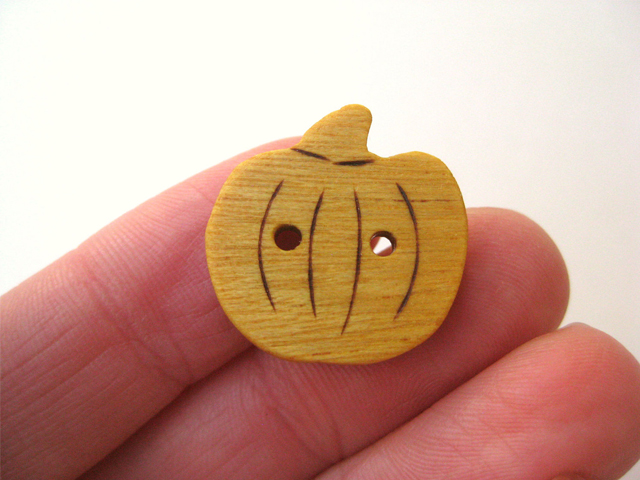
3. Handmade wood buttons by Wild Plums:


4.  Felted wool pumpkins by House of Moss:


5.  Knit pumpkin baby hat and cocoon by Mimi La Creations:


If you're not planning to make your own decorations for Halloween this year, I highly recommend checking out Etsy.  You'll be supporting the handmade crafting community and buying something that's different from all the other decorations on your block.

Happy decorating!
xoxo
Laura

Monday, October 15, 2012

Mason Jar Jack-O'-Lanterns


Halloween is almost upon us again so it's time to start decorating.  This summer, I spray painted bottles to make vases, and this week I thought it might be fun to use a similar technique on mason jars to make Jack-O'-Lanterns.  I'm so glad I gave it a try because they turned out to be something I can't wait to put out on the front porch!

Here's what you'll need to make these:

1.  Mason jars that have at least one smooth side for the Jack-O'-Lantern faces to go on.
2.  Masking tape
3.  Scissors
4.  "Frosted Glass" spray paint


Here's how you do it:

1.  Cut shapes out of masking tape and arrange them on the mason jars to make cute/scary/funny faces on the jars.


2.  Spray paint the jars (outside in the fresh air, and on top of something disposable like the paper bag I used). It's best to do several thin coats so that the paint doesn't form drips on the jar. If drips do form, however, don't sweat it.  I accidentally had some drips on my scary-faced jar and I ended up loving them because they made the face look even scarier.


3.  Let the paint dry.


4.  Peel off the tape faces and drop tea light candles inside the jars.  I used large jars, so 3 tea lights fit into each of my jars.  You're going to need a fire starter or a very long match to light the candles inside the jars.


5.  If you have the kind of jars that have lids with removable centers, remove that center and screw the lid back on the jar after you light the candles.  If you have solid lids, you'll need to poke holes in them so the candles have an oxygen source once they're lit and the lid is on. The hole-poking method will also provide a little more fire safety, so I recommend it even though it's a little more work.


Let me know if you try this out, I'd love to see a picture!
xoxo
Laura

Monday, October 31, 2011

Happy Halloween!


About a week ago, I ran across this tu(tu)torial about making a tutu for a 1-year-old, and I wanted to make one for myself (because that's totally normal, right?), so I decided to be Black Swan for Halloween.

I already had all the necessary dancewear except for a tutu and a scary crown, so those are the only things I had to make.

Here's how to make a tutu:


  • Gather up 8 yards of tulle, a ribbon to go around your waist, scissors, and a ruler.

  • Cut the tulle into 6-inch strips.

  • Cut some of the strips in half and the rest into thirds (to add extra poofyness, or you can make all the strips the same length if you want).

  • Take a half-length strip and a third-length strip, hold them together, fold them in half, and slip knot them onto the ribbon.

  • Continue adding strips to the ribbon until you've got a full tutu!

And here's how to Black Swan-ify a $1 children's pretty-pretty princess crown:


  • You will need the crown, a leftover piece of tutu tulle, glue, black nail polish, a nail file, and a couple of hair combs.

  • Break off the sides of the crown so it will sit on your head comfortably, then pull off the pink feathers.  Both of these are super easy to do if the crown is cheap.

  • Glue some black tulle where the pink feathers used to be.

  • Paint over the pink (fake) rhinestones with black nail polish.

  • Scuff up your hair combs with a nail file and then glue them onto the bottom of the crown so that it will stay on your head.

This is the final product, minus the makeup which I saved for the actual party:


And I'll leave you with the (always classy) mirror shot from the party!


Have a happy Halloween!
xoxo

Laura
Related Posts Plugin for WordPress, Blogger...