I usually only work on one knitting project at a time, and I almost never start a project and don't finish it, but apparently I'm in the mood to change my "usual" behavior.
It started when I accidentally dropped everything (including the knitting project I had just started) and read all seven Harry Potter books consecutively. I didn't plan on doing it; it just sort of happened. And then, when I finished the reading frenzy, I still didn't hop back on the knitting wagon. I spent a lot of time thinking about things I don't normally spend time thinking about. (For example, why did I spend hours designing a new iPad app in my head?) All in all, it's been a weird couple of months.
Anyway, I started knitting the braided headband pictured below a very long time ago, and it will probably only take me an hour to finish the whole thing if I ever get around to doing it.
But when I picked up some needles again this week, it wasn't to finish that headband. It was to make my boyfriend a really cool birthday present!
OK, to be honest, maybe I'll end up thinking it's more cool than he thinks it is, but I really hope he likes it. It's made out of the Colorado Avalanche's team colors, after all, and he loves that team. There is the minor hiccup that they are teetering on the edge of being kicked out of the playoffs just before the birthday, but I guess we'll cross that bridge when we come to it.
I'll be posting pictures of the finished hat soon!
And maybe I'll finish the braided headband after that? We'll see...
Do you have any half-finished knitting projects lying around your house these days?
xoxo
Laura
Wednesday, April 30, 2014
Saturday, April 26, 2014
DIY Confetti Party Invitations
In my head, there is absolutely nothing that screams "party" more than confetti does.
With that in mind, I decided to use some of it to amp up my best friend's bachelorette party invitations. It turned into a super simple DIY project that I was proud to drop into the mail. I think these cards convey the idea that the party will be fun while keeping it classy with a lot of personal (a.k.a. handmade) touches.
This is what you'll need if you want to make invitations like this:
1. Store baught cards. Mine are made by Greenroom and I bought them at Target.
2. Hole puncher
3. Colored paper
4. Scissors
5. Plastic sandwich bags
6. Washi tape
Have you ever made confetti? It's ridiculously easy and provides a type of satisfaction akin to popping bubble wrap. Just grab a hole puncher and go to town on a piece (or three) of colored paper. Gather up all the holes you punched and you've got confetti.
The next step is making little bags to put the confetti in. To do this, cut 1.5 x 1.5 inch squares out of the bottom corners of a sandwich bag.
Fill each of the little plastic squares with a couple pinches of confetti.
Now position the little confetti-filled baggie on the card, making sure that the baggie is tilted so it looks like a diamond with the two open sides on the top.
Secure the baggie to the card with a horizontal strip of washi tape, carefully placed so it covers most of the opening at the top of the bag.
It's alright to leave a bit of an opening on each of the top two sides of the baggie; this will allow a few of the confetti pieces to escape from the bag while the card is in the mail, which will add extra character to the invitation.
I also added a pinch of confetti to the insides of each card as a finishing touch.
I couldn't help myself.
There are only three and a half weeks to go until it's party time!
Happy hole punching,
xoxo
Laura
Labels:
bachelorette party,
confetti,
Crafts,
invitations,
party,
wedding
Monday, April 21, 2014
Looking Forward
There are only 4 weeks left until I get to go home again!
Sure, I'll miss the ocean views (like the one above) a little bit, but I absolutely cannot wait to get back to Colorado. I'd take the mountains over the ocean any day of the week.
I've spent the morning thinking of all the things I'm looking forward to at home, so I thought I'd share a couple of them with you.
Top 3 (crafty) things I'm looking forward to at home:
1. Getting to use my new sewing machine! My parents gave it to me for my birthday right before I left for this contract, and I never even got to try it out. I seriously can't wait for this one. I've been dreaming of all the pretty dresses I'll sew.
2. My yarn stash. (Enough said.)
3. Easily accessible natural lighting. No, my cabin on the ship doesn't have a porthole unless you count our poster of a porthole, which obviously doesn't fix the lighting problem.
It's going to be awesome!
xoxo
Laura
Friday, April 18, 2014
Bridesmaid Hairstyle #2: A Crisscross Ponytail
I tried out another wedding hairstyle idea this afternoon.
It's a crisscross ponytail that I saw on A Beautiful Mess.
It turned out to be really easy to do. I just made a ponytail while omitting sections of hair on either side in the front, then I crossed those sections of loose hair at the back of my head and secured them with a few pins. I finished it off by wrapping the remaining hair around my hair elastic and curling the ponytail.
If you're interested in trying this on your own hair, you can click on the link above for a much more in-depth step-by-step tutorial.
I love the way this style looks from the back, but from the front it looks a little plain. Maybe it would be nice to leave a few strands loose in the front and curl them?
One thing I really like about the crisscross pony is that it feels secure enough to last all evening at the wedding. The french twist that I tried out didn't hold up so well; and I think this one will perform much better in that area.
It's certainly a contender.
xoxo
Laura
Labels:
Beauty,
bridesmaid hairstyle,
hairstyles,
ponytail,
wedding
Friday, April 11, 2014
5 Spring Crafting Ideas
Since spring is finally in full bloom, I thought I'd do a roundup of my five favorite springtime crafts from blog posts gone by.
I feel like spring is the perfect time to refashion old clothes so they'll be more breezy, to make cute new accessories for freshly-bared arms, and to collect as many budding flowers as possible.
1. Bust out those scissors and make a side-tie t-shirt. It'll look great with a new swimsuit peeking out of the sides.
2. Create your own beaded wrap bracelets. They can cost a fortune if you buy them in stores and only a fraction of that if you make them yourself.
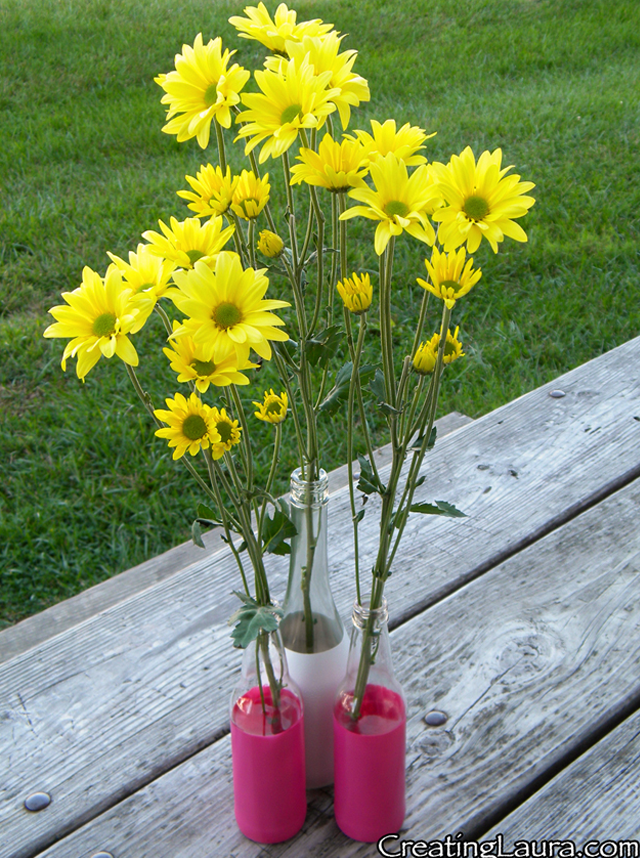
3. Reuse old bottles to make painted bottle vases. The flowers will look beautiful inside on the mantle or outside on a picnic table, plus the Earth will thank you for upcycling your trash.
4. Use some scissors and glue to fashion a bow-back tank top. It's perfect for the weather that's finally warming up.
5. Embrace the arm knitting trend and make The Triplet Shawl. It's perfect for wrapping over a swimsuit at the beach.
However you choose to celebrate the changing of the season and the long-awaited arrival of warmer weather, I hope you're loving it.
Happy spring!
xoxo
Laura
Labels:
arm knitting,
bracelet,
Crafts,
no-sew,
roundup,
spring,
t-shirt cutting,
tank top
Friday, April 4, 2014
Bridesmaid Hairstyle Idea #1: The French Twist
My best friend's wedding is less than 2 months away! I'm very excited about it.
I'm head over heels about being the maid of honor for a million reasons. One such reason is the excuse to wear a really fancy hairstyle, on which it's perfectly acceptable to spend a lot of time and energy.
I've decided to try several different hair options over the next few weeks, record them here on the blog, then pick a winner on the week of the wedding.
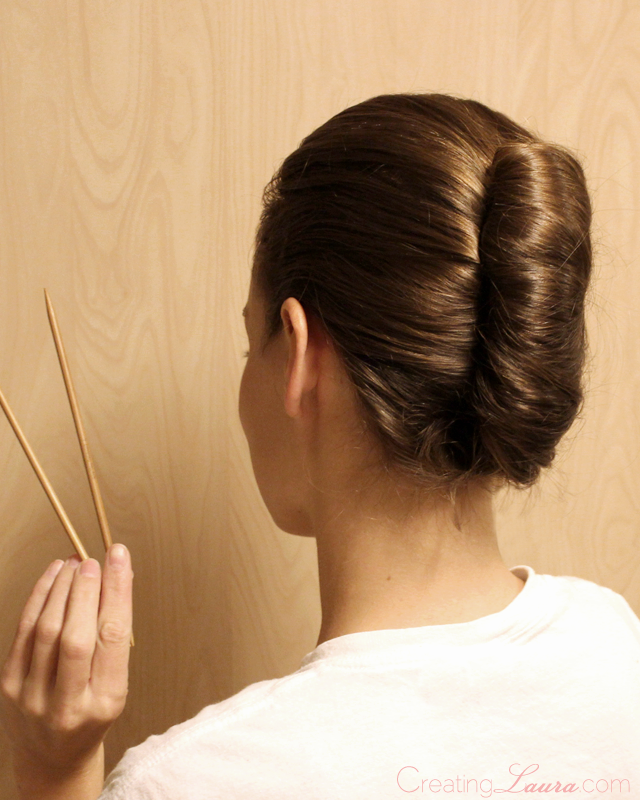
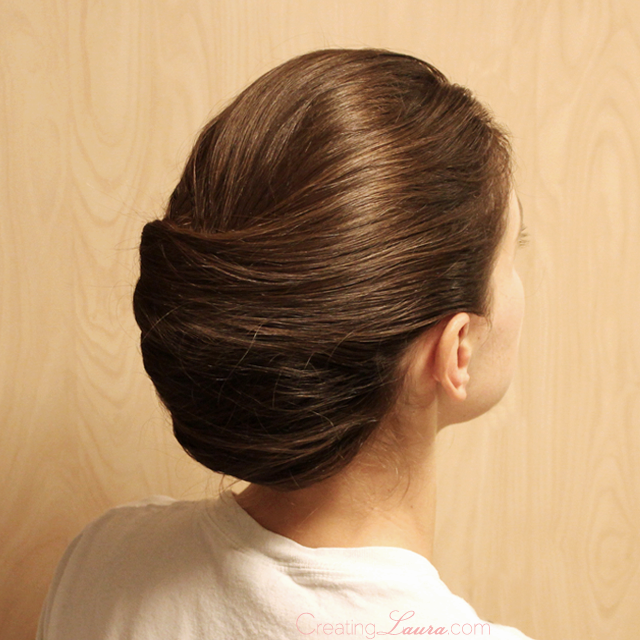
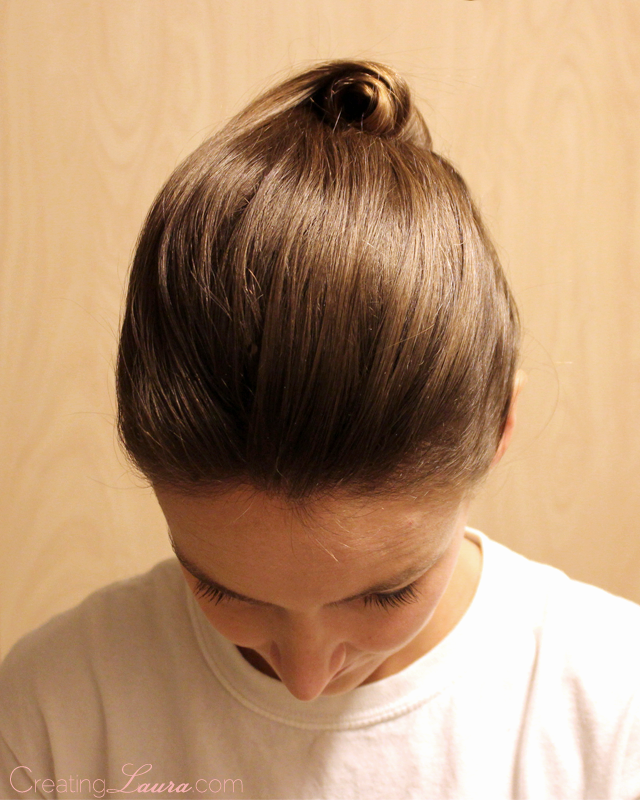
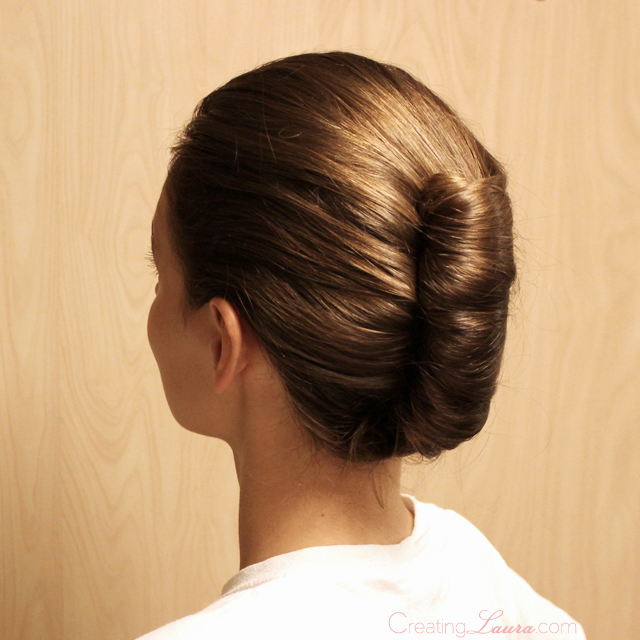
The first style I'm trying out is a french twist. It's simple, classic, and elegant, and I've actually never succeeded at doing my hair like this until today.
The cause of my sudden french-twisting abilities is the Fine Frenchy tutorial from The Beauty Department. I didn't have any chop sticks to twist my hair with, so I used knitting needles instead, but this whole concept was a total game changer for me.
Here is my first-ever successful french twist:
I've still got my hair in the twist as I type this, and I'm going to keep it in all evening to see how it holds up. I want my hair to look chic for the entirety of the wedding, not just the first hour or two, so staying power is an absolute must.
Have you ever tried the chop stick twisting technique?
xoxo
Laura
Labels:
Beauty,
bridesmaid hairstyle,
french twist,
hairstyles,
wedding
Tuesday, April 1, 2014
Link(s) to Love: Golden Easter Eggs
I'm so happy that it's finally springtime.
The weather is getting warmer, my return to Denver is drawing nearer, and there's Easter candy in the grocery stores. What's not to love?!
I'm also enjoying all the ways that gold has crept into the latest Easter egg decorating trends.
Go Make Me has a tutorial for using 3D paint and spray paint to make totally believable-looking gold bullion eggs.
Kelly is embracing the confetti over at Studio DIY with her flashy confetti dipped easter eggs.
And for the adventurous egg decorator, Camille Styles has instructions for cement easter eggs that you can use year after year.
What are your egg decorating plans this year?
Whatever they are, happy dying, dipping, and spraying!
xoxo
Laura
The weather is getting warmer, my return to Denver is drawing nearer, and there's Easter candy in the grocery stores. What's not to love?!
I'm also enjoying all the ways that gold has crept into the latest Easter egg decorating trends.
 |
| Images via Go Make Me, Studio DIY, and Camille Styles |
Go Make Me has a tutorial for using 3D paint and spray paint to make totally believable-looking gold bullion eggs.
Kelly is embracing the confetti over at Studio DIY with her flashy confetti dipped easter eggs.
And for the adventurous egg decorator, Camille Styles has instructions for cement easter eggs that you can use year after year.
What are your egg decorating plans this year?
Whatever they are, happy dying, dipping, and spraying!
xoxo
Laura
Labels:
Easter,
gold,
Link to Love
Subscribe to:
Comments (Atom)


