Showing posts with label bracelet. Show all posts

Friday, April 11, 2014

5 Spring Crafting Ideas


Since spring is finally in full bloom, I thought I'd do a roundup of my five favorite springtime crafts from blog posts gone by.

I feel like spring is the perfect time to refashion old clothes so they'll be more breezy, to make cute new accessories for freshly-bared arms, and to collect as many budding flowers as possible.

1.  Bust out those scissors and make a side-tie t-shirt.  It'll look great with a new swimsuit peeking out of the sides.


2.  Create your own beaded wrap bracelets.  They can cost a fortune if you buy them in stores and only a fraction of that if you make them yourself.


3.  Reuse old bottles to make painted bottle vases.  The flowers will look beautiful inside on the mantle or outside on a picnic table, plus the Earth will thank you for upcycling your trash.
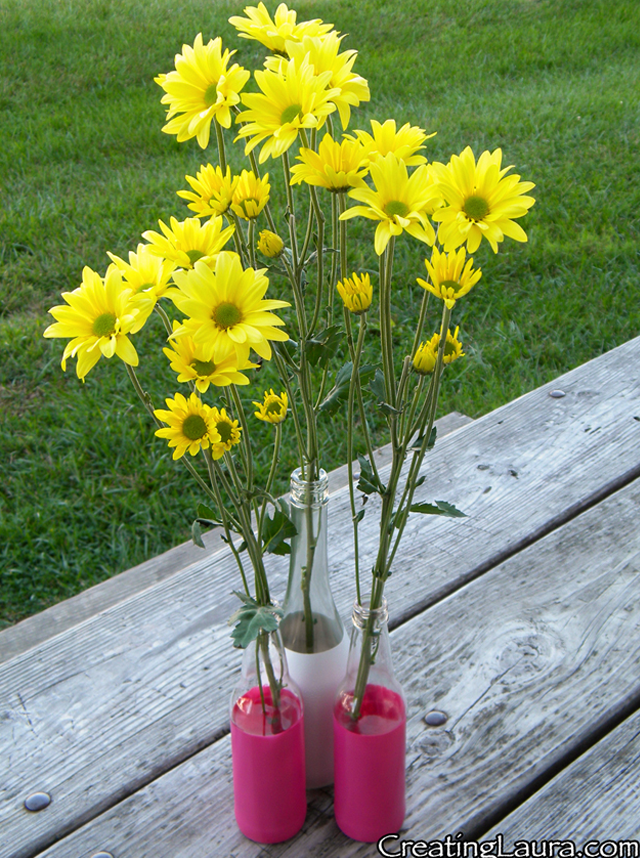

4.  Use some scissors and glue to fashion a bow-back tank top.  It's perfect for the weather that's finally warming up.


5.  Embrace the arm knitting trend and make The Triplet Shawl.  It's perfect for wrapping over a swimsuit at the beach.


However you choose to celebrate the changing of the season and the long-awaited arrival of warmer weather, I hope you're loving it.

Happy spring!
xoxo
Laura

Thursday, August 15, 2013

Wrap Bracelet Knitting Pattern


I knit myself a turquoise wrap bracelet with a pretty rhinestone button.

It's really just a glorified i-cord, which means it's a contender to be the quickest knitting project ever.  I made the whole thing while I was watching America's Got Talent the other night. (Some of my skating friends were on that show!)

Anyway, let's get down to business about the bracelet.

Materials:
A small amount of fingering weight yarn (any type that's lying around in your yarn stash)
US Size 3 double pointed knitting needles
A small button
Scissors


Directions:
To determine the length of your bracelet, measure the circumference of your wrist.  Multiply that number by 2 and then add 1 more inch.  (Example: my wrist is 6 inches around, so 6 x 2 is 12 and 12 + 1 is 13.  My i-cord should be 13 inches long.)

Cast on 3 stitches

Row 1: Knit

Row 2: Without turning your work over, slide the knitting to the other end of the knitting needle and knit again

Repeat row 2 over and over until your i-cord is the desired length. (13 inches long in my case.)

Bind off the first two stitches.

As you bind off the last stitch, leave a loop large enough for your button to pass through, as pictured below on the left.  Tie a knot with the loop still intact and cut off the excess yarn.

On the other side of the i-cord, thread the button through the tail that you left while casting on, tie a knot to secure it, and cut off the excess yarn.


Pretty fun and easy, huh?

I wore my new bracelet to a party at my friend's farm yesterday, along with the skirt that I sewed.  I love wearing things that I've made myself, don't you?


Happy knitting!
xoxo
Laura

Saturday, September 22, 2012

Beaded Wrap Bracelets

Hello!
Have you been seeing these beaded wrap bracelets all over the place like I have?


You can get everything from the $200 Chan Luu version to the ones that are on sale right now at Urban Outfitters.  Or, if you're like me, you can take a close look at one of them, experience all of your childhood beading skills come flooding back to you, and make them yourself.  Why buy it when you can make it and have it look exactly the way you want it to for a fraction of the price?

To make these bracelets you will need:
  • Clear, stretchy jewelry cord, 0.5 mm diameter
  • Black cotton or leather jewelry cord, 1 mm diameter
  • Beads in 2 different colors with large enough holes to fit the clear jewelry cord through it twice (I used 6/0 Czech glass e-beads from Joann's.)
  • Silver magnetic clasps
  • Scissors
  • Tape

The basic idea is that there are 2 parallel black cords with a bead in between them.  You will use a stretchy clear string to make a figure 8 around those 2 cords, passing through the bead in the middle twice along the way.  (Picture #11 is a good illustration of how the figure 8 should look.)  Just make your figure 8s over and over, adding more and more beads as you go and you'll have a wrap bracelet.

Here are the much more in-depth instructions:


*These instructions are for making a 13 inch bracelet for a 6 inch wrist.  That way the bracelet can wrap around the wrist twice with 1 extra inch of wiggle room.  If your wrist is larger than 6 inches, simply double your wrist size and add one more inch to find out how long you want your bracelet to be.*

  1. Cut off 34 inches of black cord and fold it in half so it will be 17 inches long.  Then cut a 51 inch piece of stretchy clear string.  (The clear string should be 3 times as long as the doubled-up black cord.)

  2. Thread one side of the metal clasp onto the black cord so it sits in the fold you made earlier. Then tie the clear string onto the clasp as well.

  3. Wrap all three strings around your finger and tie them in a knot.  The knot should sit directly below the clasp.  Cut off the tail of the clear string.  Now you're ready to start beading.

  4. Tape the clasp-end of the bracelet onto a table.  Add one bead to the clear string and position it so it is sitting between the two black cords.

  5. Wrap the clear string around the left-hand black cord (going over the black cord first then under it second), then thread the clear string back through the same bead.

  6. Pull the string so the loop you just made tightens up and the bead sits right underneath the clasp and the knot.  Now wrap the clear string around the right-hand black cord (going over first then under second).

  7. Add another bead to the clear cord.

  8. Wrap the clear string around the left-hand black cord the same way you did it before (in step 5), and thread it back through the second bead.

  9. Pull the clear string so the loops tighten up and the second bead sits right next to the first one.  Continue making figure 8s with the clear string around the right-hand black cord, though a new bead, around the left-hand black cord, through the same bead again, and then pulling the clear string so everything's nice and tight.

  10. After you've added 8 beads using the figure 8 method, make the 9th bead an alternate color.

  11. Continue making figure 8s and adding new beads (with every 9th bead being the alternate color) until the bracelet is almost 13 inches long.

  12. Loop the clear string around the right hand black cord and tie it in a knot.

  13. Slip the 2nd half of the metal clasp onto the right-hand black cord and the clear string.

  14. Loop all the strings around your finger to tie a knot.

  15. Pull the knot tight, keeping the metal clasp at the top of the knot.

  16. Cut off the excess strings and you're finished!  Your bracelet should look like this now:


I made mine in shades of pink just because it's my favorite color.  If you want to make your bracelets look more like a fall accessory, try making them in deep purples or rich browns.  Look how fun mine look hanging all together on my jewelry tree:


Happy beading!
xoxo
Laura

Wednesday, June 13, 2012

Grownup Friendship Bracelets

Hello from Sandusky, Ohio!

I'm here all summer doing a really fun show at a really fun amusement park, and in one of the numbers in our show we get to dress up as ice skating crayons.  It's so funny!  Nothing gets me quite like dancing inanimate objects do.


In honor of our silly kids' number, for opening day I decided to make friendship bracelets for all my cast mates in their corresponding crayon colors.


Here's How You Do It:

  1. Cut 3 strips of black embroidery floss and 1 strip of an alternate color to 40" each.  Fold each individual strand in half then put them all together and tie them in a knot where you folded them, leaving a small loop for later. Tape the loop to the edge of a table and separate the strands into 4 sets of 2 as shown. For instructional purposes let's call the black strands A B and C and the alternate color stand will be X.

  2. Bring C over B and under X.

  3. Bring A under C and over X.

  4. Repeat steps 2 and 3 until you have braided the entire length of string.  It helps me to say "over under, under over" while I'm doing the braiding.  It also helps to hold all four strings in your hands at once, keeping them taut.  Once you let a strand or two start dangling, it's harder to keep the braid straight and even. Now begin your knot by looping the braid around your finger.

  5. Pull the loose end through the loop.

  6. Pull the knot tight.

  7. You've made the bracelet!  I made all of my bracelets up to this point and then wrapped them up in the paper that crayons are wrapped in and brought them to work.  (The crayon paper was courtesy of my boyfriend, Justin, who is dressed up as the hunky orange crayon in the picture at the beginning of this post.)  Once I had given them to everyone, I sized them to their wrists and added the finishing touches.

Here's how to size and finish the bracelets:


1.  Wrap the bracelet around the recipient's wrist twice to measure how long it should be.

2.  Tie a knot in the bracelet to mark the spot where you want it to end.
3.  Cut off the original knot you tied at the end of the un-measured bracelet you made earlier.

4.  Separate the contrasting colored strands from the black strands. (In this case, the contrasting colored strands are the light blue ones.)

5.  Thread the contrasting colored strands through the holes of a small button.

6.  Thread the same strands through the button holes again so they end up on the underbelly of the button.

7.  Cut off all the excess strings so that they can only be seen beneath the button.

8.  Put a dab of Mod Podge or other clear-drying glue on the end of the strings on the underside of the button so the knot won't come undone later.

9.  Let it dry and you've now got a custom-sized grown-up bracelet for one of your friends!


Here's what a finished bracelet looks like:


Notice how the button that you attached to the end fits neatly through the loop that you made in the very first step when you started making the bracelet?  If your loop is too big, your button will slip back out of the loop while you're wearing it and the bracelet will fall off.  If you have that problem, just tie another knot next to the original knot at the base of the loop.  It will make the loop smaller.

Aren't these bracelets so fun?  They are basically just the same as the ones that I made when I was a kid, but the double-wrapping and the button add that little something extra that distinguishes the things we love as grownups from the things we loved as kids.

Until next time,
xoxo
Laura
Related Posts Plugin for WordPress, Blogger...