Showing posts with label stripes. Show all posts

Thursday, March 7, 2013

Nautical Style

I accidentally fell in love with a super expensive swimsuit.  It's the Port Stripe Halter Bra swimsuit from Juicy Couture, and I think it is the perfect nautical fashion statement.  It has the classic nautical stripes, a cute little anchor on the front, and the ties in the back are made of white rope. Isn't it so fun?

Image via Juicy Couture


I'm loving all things nautical lately, though, so I'm not pulling out my wallet for that swimsuit yet.

To be clear, I'm loving fashion's whimsical take on the nautical theme, which is different from the industrial feel of actually living full time on a ship like I do.  While it's an adventure, the real ship life is not nearly as adorable; my uniform onboard is a bright blue polyester track suit.  Ugh.

Here are some other playful (non-track-suit) nautical pieces that I love:


1.  I love the red rope detail on these Valentino nautical ballet flats.
2.  The sparkles on this nautical sequin anchor tank from Delia's stand out in a very good way.
3.  This "life ring" from Asprey London is classy and cheeky at the same time.
4.  The fit and flare shape of Kate Spade's Mariella dress looks chic with a navy nautical stripe.
5.  I can't get enough of the watercolor details on the Candace Carryall by Coach.
6.  These bright red anchor earrings from River Island prove that the cutesy nautical vibe can also be affordable.

Do you love nautical fashion as much as I do?
xoxo
Laura

Sunday, December 30, 2012

Knitting Men's Mittens

For Secret Santa this year, I knitted some mittens. I was aware that doing so would definitely give me away as the gift giver, but I just couldn't help myself. Robert needed some mittens!

Also, did you know that men's hands are enormous? I'm used to women's sizes, so it was a little bit shocking to watch these giant things keep growing and growing on my needles.


I used the Basic Mitten Pattern from Mittens and Hats for Yarn Lovers by Carri Hammett in the men's large size. I also added my own flair to the pattern by adding stripes, switching colors every 4 rows.

I carried the two colors on the inside of the mittens, and I was happy with how tidy they ended up looking, even when they are inside out.  See?


Before I wrapped up the mittens, I had Justin model them for me along with his new Denver mug that his mom gave him for Christmas.  Speaking of which, without even knowing it, my mom gave me a matching Hawaii mug for Christmas and the two mugs look great together on our shelf; a happy Christmas accident.


Did you knit anything for Christmas this year?
xoxo
Laura

Wednesday, July 4, 2012

Hair Bow Happiness

Happy 4th of July!

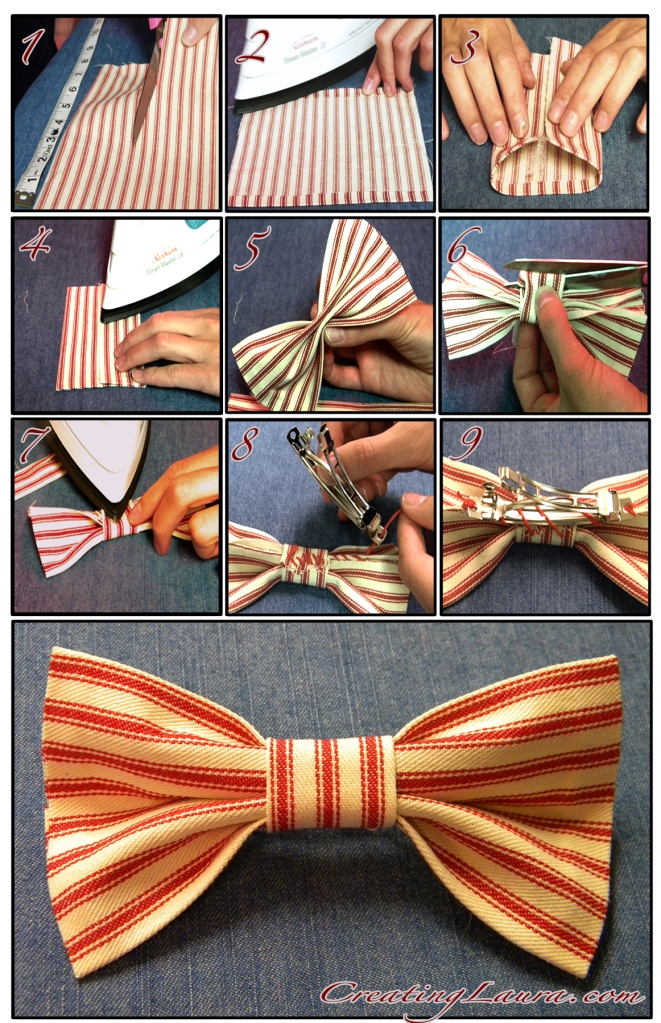
When I was looking around the internet for fun, patriotic DIY projects for my last blog post, I was really surprised that I didn't find anything about great hair accessories. I decided to remedy that by making a big, red, stripy bow and a tutorial to go along with it. Check it out:


I wanted to take the "no-sew" approach to this project, so I got some 1/4 inch thick Stitch Witchery iron-on fabric adhesive from Joann's. I also got a whole packet of big hair clips for $2 and a half yard of fabric, of which I only used a teensy bit for the bow.

Here's how to make it:

  1. Cut out a 5.5” x 6” piece of fabric so that the bow will be 5” x 3” when it's finished.

  2. With the front of the fabric facing down, find the 6” side of the rectangle and fold that edge over a quarter of an inch. Place a strip of fabric adhesive inside the fold and iron it down.  The heat will activate the adhesive and make the fold permanent.  Now repeat this step on the opposite edge, as shown.

  3. Fold the sides of the fabric together like french doors so that the 6” width becomes a 3” width.

  4. Put several strips of fabric adhesive inside the folds you’ve just made and iron it all together.

  5. Pick up your freshly-made 5” x 3” rectangle and pinch the middle of it between your fingers.  It should look like a bow now.

  6. Cut out a 1.5” wide strip of fabric and fold it french door style like you did to the other fabric in step 3.  Put some fabric adhesive inside the folds and iron it down to make a strip of fabric that’s 1 inch wide.  Wrap this strip around the middle of the bow where you were pinching it with your fingers.  Cut it so that it’s just long enough to overlap itself in the back of the bow.

  7. Add some fabric adhesive under the overlapped portion at the back of the bow and iron it down.

  8. In theory, you should now have a no-sew bow.  I felt a little unsure about the strength of the fabric adhesive, however, so at this point I took a big needle and some embroidery thread and sewed down the middle strip on the back of the bow in order to make the whole thing extra-sturdy.  I think it really helped, so I recommend doing it.  Then I continued my stitches along the seam on the back of the bow and began to sew in the hair clip.  While you are doing this, make sure that you only sew through the back part of the fabric so that your stitches don’t show on the front of the bow.

  9. Sew the rest of the clip onto the bow, and you’re all done.  Turn it over and admire your work!


I’m really happy with the way my bow turned out, and I hope you are equally happy with yours if you make one too!  I wore mine all day by the pool yesterday at our day-early 4th of July cast party, and it added the perfect amount of festive flair.

Enjoy your holiday!
xoxo
Laura

Saturday, November 26, 2011

Knitting for a European Winter Part 1: Manly Scarf


I don't think I've mentioned it, but this blog has officially gone on tour!  Right now we are in Utrecht, The Netherlands and while I like it here, it is also cold and foggy, which makes it perfect scarf weather.  I decided to make a simple striped scarf with fringe on the ends for my boyfriend. I let him pick out his colors and he picked white, green, and a greyish yarn that changes colors. Because he liked three colors, I ended up making white and green stripes with the color-changing grey yarn throughout the whole thing, which added a randomized pattern for a unique look.


I didn't use a pattern to make this scarf, I just knew I wanted big chunky stripes in stockinette stitch with a garter stitch edging, so I did the following:
  1. Use size 8 needles.  Hold the white yarn and the grey yarn at the same time, cast on enough stitches to make the scarf 10 inches wide.

  2. Knit the first row.

  3. On the second row, knit the first 3 stitches, purl all the middle stitches, knit the last 3 stitches.

  4. Repeat steps 2 and 3 until the scarf is 6 inches long.

  5. Cut the white yarn, leaving at least 6 inches to weave in later, and start using the green yarn for the next row.  Never cut the grey yarn as it will be used throughout the entire scarf.

  6. With the green and the grey yarns, repeat steps 2 and 3 again until you have 6 more inches of scarf.

  7. Then cut the green yarn, leaving at least 6 inches to weave in later, and switch back to the white yarn.

  8. Continue alternating the green and white yarn, making 6 inch stripes, until the scarf is 5 feet long.

  9. Cast off.


10. Weave in all the loose ends where you switched colors.


Now it's time for the fringe:
  1. Cut 6 inch strips of yarn.

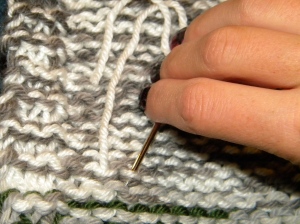
  2. Use a needle to pull the strips through a loop on the edge.

  3. Make a slip knot.

  4. Repeat steps 1 through 3 until there is fringe all along the edge.
.

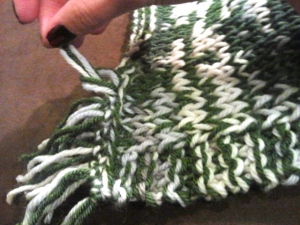
The final product looks like this:


Happy knitting!
xoxo
Laura
Related Posts Plugin for WordPress, Blogger...