Showing posts with label recipes. Show all posts
Showing posts with label recipes. Show all posts
Thursday, July 18, 2013
Potato-Crusted Fried Green Beans
There's a TGI Friday's near our apartment so we hang out there sometimes. My friend, Katie, orders the fried green beans every time we go, and I always feel a little bit jealous.
Yesterday I decided to try making them gluten free at home with boxed mashed potatoes instead of flour and it totally worked! Here's the recipe.
Ingredients:
Green beans
2 egg whites
Boxed mashed potatoes (I used Idahoan Original Mashed Potatoes. If you use a different brand, make sure they're gluten free.)
Salt and pepper
Oil
Directions:
1. Pour an inch of oil into a medium-sized pot and heat it to 350 degrees f.
2. Separate the eggs and pour the whites into a bowl.
3. Combine 1/2 cup mashed potatoes, 1 tsp salt, and a dash of pepper onto a plate or shallow bowl.
4. Dip each green bean into the egg whites, then the potato mixture, then drop them into the pot of oil for 3 to 4 minutes, until they're golden brown.
5. Scoop the beans out of the oil and place them onto a paper towel on a plate.
6. Sprinkle with salt and serve!
These were so crunchy and delicious! Justin and I also think it would be fun to try making them with flavored mashed potato mixes like the pouch of bacon & cheddar chipotle potatoes that's currently sitting in our cupboard. I'll let you know how it goes if we do it.
Happy frying!
xoxo
Laura
Labels:
food,
fried green beans,
gf kitchen adventures,
gluten-free,
recipes
Wednesday, May 15, 2013
DIY Washi Tape Recipe Notebook (with free Printable)
There's only one week left until I head off to my next ice show contract. (Eek.) I've been doing a bit of packing and a lot of crafting to gear up for this next adventure.
I'll have a full kitchen on this next contract and I couldn't be more excited about it! I've been pinning recipes on pinterest, checking out cookbooks from the library, and leafing through cooking magazines in checkout lines like a woman who is totally obsessed.
The obsession has been paying off, though, and I've amassed tons of recipes that I can't wait to make this summer. I wanted to keep all those recipes in one organized place, so I decided to make a recipe notebook. This notebook needed some washi tape on it. Obviously.
You can download the Yum! printable right here.
Here's what you'll need if you want to make this notebook too:
1. A notebook. I used a 9" by 12" sketch pad that was on sale at Micheals for $5.
2. The printed out Yum! printable
3. A piece of thick paper to go in between the notebook cover and the printable so the design on the cover of the notebook won't be visible through the printable.
4. Two kinds of washi tape
5. Scissors
Directions:
Start by printing and cutting out the free printable Yum!
Now set the Yum! aside and start washi taping the notebook. Yes, I did just use "washi taping" as a verb.
1. Cut the thick piece of paper so it's the same size as the notebook, place it on top of the notebook, and use washi tape to secure the two outside corners (the top right and bottom right) so that it looks like there is a triangle of washi tape in those two spots.
2. Place 4 more strips of washi tape on the bottom right corner of the notebook, parallel to the strip in the corner, wrapping the excess tape around onto the back of the cover. Do the same thing on the bottom left corner, but don't wrap the tape around the cover yet. Instead, leave the excess tape hanging off the cover (as pictured above) and then cut it off of the side with the spiral binding with scissors once you've placed all 5 strips of tape. Now you can wrap the excess tape on the bottom edge around the cover. Tape the top corners exactly as you taped the bottom corners.
3. Now that all of the corners are taped, it's time to fill in the middle. Starting at the bottom and working your way up, apply 5 more strips of washi tape as pictured above. This time the tape will be horizontal instead of diagonal. Cut off the rough edges of the tape strips diagonally so they match up with the diagonal tape.
4. Repeat step 3 on the remaining 3 sides of the cover. Once you've done that, your notebook should look like the 4th picture above.
Now it's time to place the Yum! printable in the middle of the notebook and tape down it's entire perimeter using the second type of washi tape. You're notebook cover is all finished (yay!) and it should now look like the very first picture in this post.
Fill the inside of your notebook with recipes from all over the place: cutouts from magazines, printouts from websites, handwritten notes from your parents' kitchen, etc.
To add a little extra flair, use washi tape to tape in the recipes. That way the inside of the notebook matches the cover and the whole thing will feel more cohesive.
I found that most printouts from websites will already have the recipe source printed somewhere on the page (like the Caramelized Peach and Brie Quesadilla with Honey Recipe from Oprah.com). If the printout doesn't have that, or if you're using a recipe from a magazine or a book, make sure that you write down where the recipe came from. That way you can refer back to the original source if you ever want to share the recipe with a friend or write about it on your blog. (I'm a firm believer in citing your sources!)
I'm super excited to get cooking, and I hope that this post has inspired you too! What are your favorite recipes?
Happy cooking!
xoxo
Laura
Labels:
food,
free printable,
journal,
notebook,
recipes,
washi tape
Wednesday, October 24, 2012
Gluten Free Macaroni and Cheese
October is National Celiac Disease Awareness month, so I decided to share my favorite gluten free recipe with you today: macaroni and cheese! This recipe is my favorite because my dad made it up for me a long time ago, and it's incredibly simple, and it tastes cheesy and delicious in exactly the way good comfort food should taste.
Have you ever wondered why all my recipes on Creating Laura are gluten free? I wrote a post about why I'm gluten free on the new lifestyle blog (Two Buttons and a Blog) that I co-write with my best friend, Karleen, so you can check it out if you're interested.
Macaroni and Cheese Ingredients:
Directions:
Also, because I use the entire bag of pasta, this makes a huge batch. I like to put the leftovers in the fridge and eat them for lunch for the rest of the week.
What's your favorite comfort food?
xoxo
Laura
Have you ever wondered why all my recipes on Creating Laura are gluten free? I wrote a post about why I'm gluten free on the new lifestyle blog (Two Buttons and a Blog) that I co-write with my best friend, Karleen, so you can check it out if you're interested.
Macaroni and Cheese Ingredients:
- 1 bag Tinkyada Pasta Joy gluten free brown rice elbow pasta
- 1 tbsp butter
- 1 tbsp gluten free flour (I used Deby's gluten free flour)
- 1 cup milk
- 12 oz mild cheddar cheese, shredded
- salt
Directions:
- Boil the gluten free pasta, following the directions on the package, and wait until the noodles have only 10 minutes left to cook before you begin making the sauce.
- Start the sauce with a roux by stirring the butter and the gluten free flour together over low/medium heat.
- Slowly add the milk and the cheese, stirring the whole time, until an even consistency is achieved.
- Add salt to taste to complete the sauce.
- Drain the pasta and transfer it to a large bowl.
- Pour the sauce onto the pasta and stir until it is evenly coated.
Also, because I use the entire bag of pasta, this makes a huge batch. I like to put the leftovers in the fridge and eat them for lunch for the rest of the week.
What's your favorite comfort food?
xoxo
Laura
Saturday, October 6, 2012
(Gluten free) Pumpkin Muffins
Yesterday was the first really cold day we've had this fall, so we lit the fireplace and I put on some warm socks and a sweater and baked some pumpkin muffins. I wanted to use one of the Betty Crocker gluten free baking mixes but I couldn't find a recipe that incorporated the mix, so I made up my own. I basically just followed the cupcake instructions on the back of the box, except I replaced 2 of the eggs with a 1/2 cup of pumpkin and added some yummy spices.
Ingredients:
Ingredients:
- Betty Crocker Gluten Free Yellow Cake Mix
- 2/3 cup water
- 1 stick (1/2 cup) softened butter
- 2 teaspoons gluten free vanilla
- 1 egg
- 1/2 cup canned pumpkin
- 1 tbsp cinnamon
- 1 tsp pumpkin pie spice
Directions:
- Heat oven to 350 degrees.
- Beat all of the ingredients on low speed for 30 seconds, then on medium speed for 2 minutes, scraping the bowl occasionally.
- Pour the batter into 18 paper baking cups in muffin pans.
- Bake for 18-23 minutes. When a toothpick inserted into the center of a muffin comes out clean, they are fully cooked.
I'm so happy with the way these muffins turned out! They are nice and moist because of the pumpkin, with a delicate flavor to them. But really, how could they not be good? I made them with cake mix, so they are basically cupcakes masquerading as muffins, and who doesn't love that? If you topped these with some cream cheese frosting (and maybe even added a few chocolate chips to the batter) you would have some seriously awesome cupcakes. But I'm choosing to pop them in the microwave for a few seconds, spread some butter on them, and eat them like the fabulous fall breakfast treat that they are (accompanied by a steaming cup of coffee, of course).
Happy fall!
xoxo
Laura
Monday, July 2, 2012
4th of July Ideas from around the Web
Hi there!
Can you believe it's already July 2nd?
I did some serious blog browsing last night, and there are tons of really great ideas out there for decorating, primping, eating, and having an all-around fun time this Independence Day. Below, I've compiled a list of my 5 favorites...
1. Patriotic Paper Flowers DIY tutorial from Live Laugh Rowe
2. Red White and Blue Jello Shots recipe from Saucy Pants
3. Patriotic Nail Art tutorial from The Beauty Department

4. 4th of July Bunting free printable from Nifty Thrifty Things
5. Watermelon Stars idea from One Hungry Mama
Happy 4th of July!
xoxo
Laura
Can you believe it's already July 2nd?
I did some serious blog browsing last night, and there are tons of really great ideas out there for decorating, primping, eating, and having an all-around fun time this Independence Day. Below, I've compiled a list of my 5 favorites...
1. Patriotic Paper Flowers DIY tutorial from Live Laugh Rowe
2. Red White and Blue Jello Shots recipe from Saucy Pants
3. Patriotic Nail Art tutorial from The Beauty Department

4. 4th of July Bunting free printable from Nifty Thrifty Things
5. Watermelon Stars idea from One Hungry Mama
All of those awesome pictures are from the original blog posts and I don't own them, so head on over to those blogs to check out more great pictures and all the fun tutorials that go along with them.
Happy 4th of July!
xoxo
Laura
Labels:
4th of July,
Crafts,
Fun/Random,
holiday,
Independence Day,
nails,
recipes
Sunday, October 16, 2011
(Gluten-Free) Pumpkin Cookies

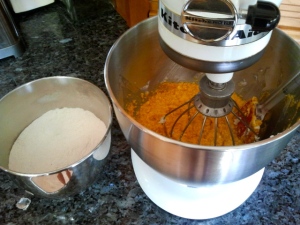
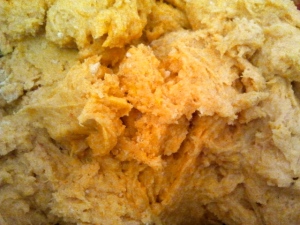
Fall has always been my favorite time of year, and one of the reasons why is all the yummy food. (Two words: Halloween, Thanksgiving. Enough said.) Every fall, for as long as I can remember, my mom has baked her homemade pumpkin cookies and I love them with all of my heart. Today, I decided to try to make them myself!

That is a picture of my mom's recipe. It changed slightly a few years ago when I found out that I couldn't eat gluten anymore, but all my mom did was replace the flour with a gluten-free flour mix. If you are a gluten eater and you would like to make this recipe, regular flour will still work great.

Ingredients:
- 1 cup shortening
- 3/4 cup sugar
- 1 egg
- 1/2 teaspoon orange extract
- 1/2 teaspoon vanilla
- 1 cup canned pumpkin
- 1 3/4 cups gluten-free flour mix (make sure it includes either xanthan gum or guar gum for texture)
- 1 teaspoon baking powder
- 3/4 teaspoon salt
- 1/2 teaspoon pumpkin pie spice


Directions:
- Preheat oven to 350 F.
- Cream shortening and sugar until fluffy.
- Beat in egg, orange extract, and vanilla.
- Stir in pumpkin.
- Sift together flour, baking powder, salt, and pumpkin pie spice.
- Add flour mixture to egg mixture, mixing well.
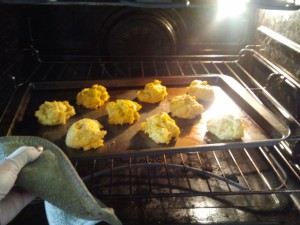
- Drop by rounded tablespoons onto greased baking sheet.
- Bake at 350 for 12 to 15 minutes.
Today's batch turned out delicious, and now the house smells great.
I'm calling it a success.
xoxo
Laura
Subscribe to:
Posts (Atom)


