Showing posts with label pattern. Show all posts

Sunday, September 30, 2012

Knitted Leaves

In my last post, I told you about my first ever yarn bombing experience.  (Eek!)  In this post, I'll give you the pattern for the knitted leaves that I made.  If you know how to knit, purl, do stitch increases and decreases, and make an i-cord, you'll be able to make these little guys. 


Equipment Needed:
  • Worsted weight yarn in a fun fall color
  • US size 7 double pointed needles
  • Scissors
  • Tapestry needle for weaving in the ends

Abbreviations used in this Pattern:
  • m1 = make one (increase stitch)
  • k2tog = knit 2 stitches together (decrease stitch)
  • k3tog = knit 3 stitches together (decrease stitch)
  • k2tog (tbl) = knit 2 stitches together, inserting the right needle through the back of the loops instead of through the front of them (decrease stitch)
  • k3tog (tbl) = knit 3 stitches together, inserting the right needle through the back of the loops instead of through the front of them (decrease stitch)
  • p2tog = purl 2 stitches together (decrease stitch)
 

Pattern:
  • Cast on 3 stitches
  • Make a 1.5" i-cord
  • Row 1: purl 1, knit 1, purl 1
  • (Increase) Row 2: knit 1, m1, purl 1, m1, knit 1
  • Row 3: purl 2, knit 1, purl 2
  • (Increase) Row 4: knit 1, m1, knit 1, m1, purl 1, m1, knit 1, m1, knit 1
  • Row 5: purl 4, knit 1, purl 4
  • (Increase) Row 6: knit 2, m1, knit 2, m1, purl 1, m1, knit 2, m1, k2
  • Row 7: purl 6, knit 1, purl 6
  • Row 8: knit 6, purl 1, knit 6
  • Row 9: purl 6, knit 1, purl 6
  • (Decrease) Row 10: k2tog, knit 4, purl 1, knit 4, k2tog (tbl)
  • Row 11: purl 5, knit 1, purl 5
  • Row 12: knit 5, purl 1, knit 5
  • Row 13: purl 5, knit 1, purl 5
  • (Decrease) Row 14: k2tog, knit 3, purl 1, knit 3, k2tog (tbl)
  • Row 15: purl 4, knit 1, purl 4
  • (Decrease) Row 16: k2tog, k2, p1, k2, k2tog (tbl)
  • Row 17: purl 3, knit 1, purl 3
  • (Decrease) Row 18: K3tog, purl 1, k3tog (tbl)
  • (Bind off) Row 19: purl 1, p2tog, bind off the two stitches.


You'll notice in the pictures above that I wove in the loose ends at the pointy side of the leaves but I left the loose ends hanging off of the leaves' i-cord stems.  That's because I used those loose ends to tie the leaves onto the tree.  Today I revisited my tree and was delighted to see the yellow leaves dancing in the wind.


Happy knitting!
xoxo
Laura

Sunday, January 8, 2012

Little Knitted Flowers


Hello from Zwalle, The Netherlands!

For Christmas this year, I wanted to make a little something for all 15 of the chorus girls in my show, so I decided to knit them cute little flowers with safety pins on the back so that they could attach them to anything they would like.  There were two very definite perks to this project.  Perk number one was that each flower didn't require very much yarn so I could use leftover yarn from other projects, and perk number two was that each one only took about 20 minutes to knit so I could make a whole bunch of them in a short period of time.  Oh, and did I mention that they're cute and can attach to anything?

Here's what you will need to make these:


  • Just a little bit of yarn per flower

  • Size 7 needles

  • Tapestry needle

  • Scissors

  • Large safety pins

And here's how you make them:


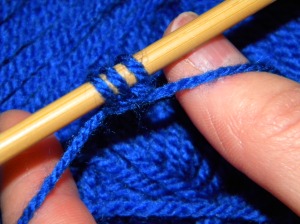
  • Row 1: Cast on 3 stitches

  • Row 2: Purl

  • Row 3: Knit front and back of each stitch in the row

  • Repeat rows 2 and 3 until you have 48 stitches (first there will be 3 then 6 then 12 then 24 then 48 stitches on the kneedles)

  • Purl one last row

  • Cast off

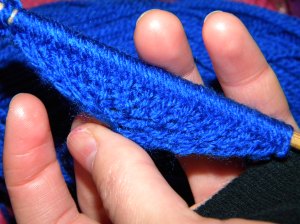
As you cast off, the yarn will curl off the kneedles like this:


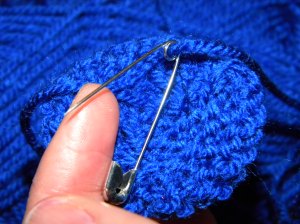
Once you have fully cast off, the yarn will already be twirling around naturally, so let it curl up like a flower, attach the tapestry needle to the loose ends and sew them in so that they hold the flower together.  Once the shape of the flower is secure, wrap those same ends around the safety pin to attach it to the bottom of the flower like this:


And with that, you've got a little flower that you can pin onto your hat or your coat or your scarf or your sweater or your mittens or...


xoxo
Laura

Saturday, November 26, 2011

Knitting for a European Winter Part 1: Manly Scarf


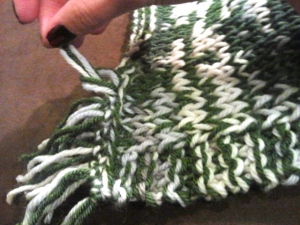
I don't think I've mentioned it, but this blog has officially gone on tour!  Right now we are in Utrecht, The Netherlands and while I like it here, it is also cold and foggy, which makes it perfect scarf weather.  I decided to make a simple striped scarf with fringe on the ends for my boyfriend. I let him pick out his colors and he picked white, green, and a greyish yarn that changes colors. Because he liked three colors, I ended up making white and green stripes with the color-changing grey yarn throughout the whole thing, which added a randomized pattern for a unique look.


I didn't use a pattern to make this scarf, I just knew I wanted big chunky stripes in stockinette stitch with a garter stitch edging, so I did the following:
  1. Use size 8 needles.  Hold the white yarn and the grey yarn at the same time, cast on enough stitches to make the scarf 10 inches wide.

  2. Knit the first row.

  3. On the second row, knit the first 3 stitches, purl all the middle stitches, knit the last 3 stitches.

  4. Repeat steps 2 and 3 until the scarf is 6 inches long.

  5. Cut the white yarn, leaving at least 6 inches to weave in later, and start using the green yarn for the next row.  Never cut the grey yarn as it will be used throughout the entire scarf.

  6. With the green and the grey yarns, repeat steps 2 and 3 again until you have 6 more inches of scarf.

  7. Then cut the green yarn, leaving at least 6 inches to weave in later, and switch back to the white yarn.

  8. Continue alternating the green and white yarn, making 6 inch stripes, until the scarf is 5 feet long.

  9. Cast off.


10. Weave in all the loose ends where you switched colors.


Now it's time for the fringe:
  1. Cut 6 inch strips of yarn.

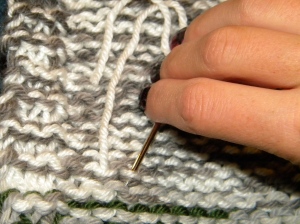
  2. Use a needle to pull the strips through a loop on the edge.

  3. Make a slip knot.

  4. Repeat steps 1 through 3 until there is fringe all along the edge.
.

The final product looks like this:


Happy knitting!
xoxo
Laura
Related Posts Plugin for WordPress, Blogger...